Cloudflare
Creating a Cloudflare account
Follow the instructions in this page below to create your Cloudflare account.

Registering a Domain Name (also known as buying a domain name)
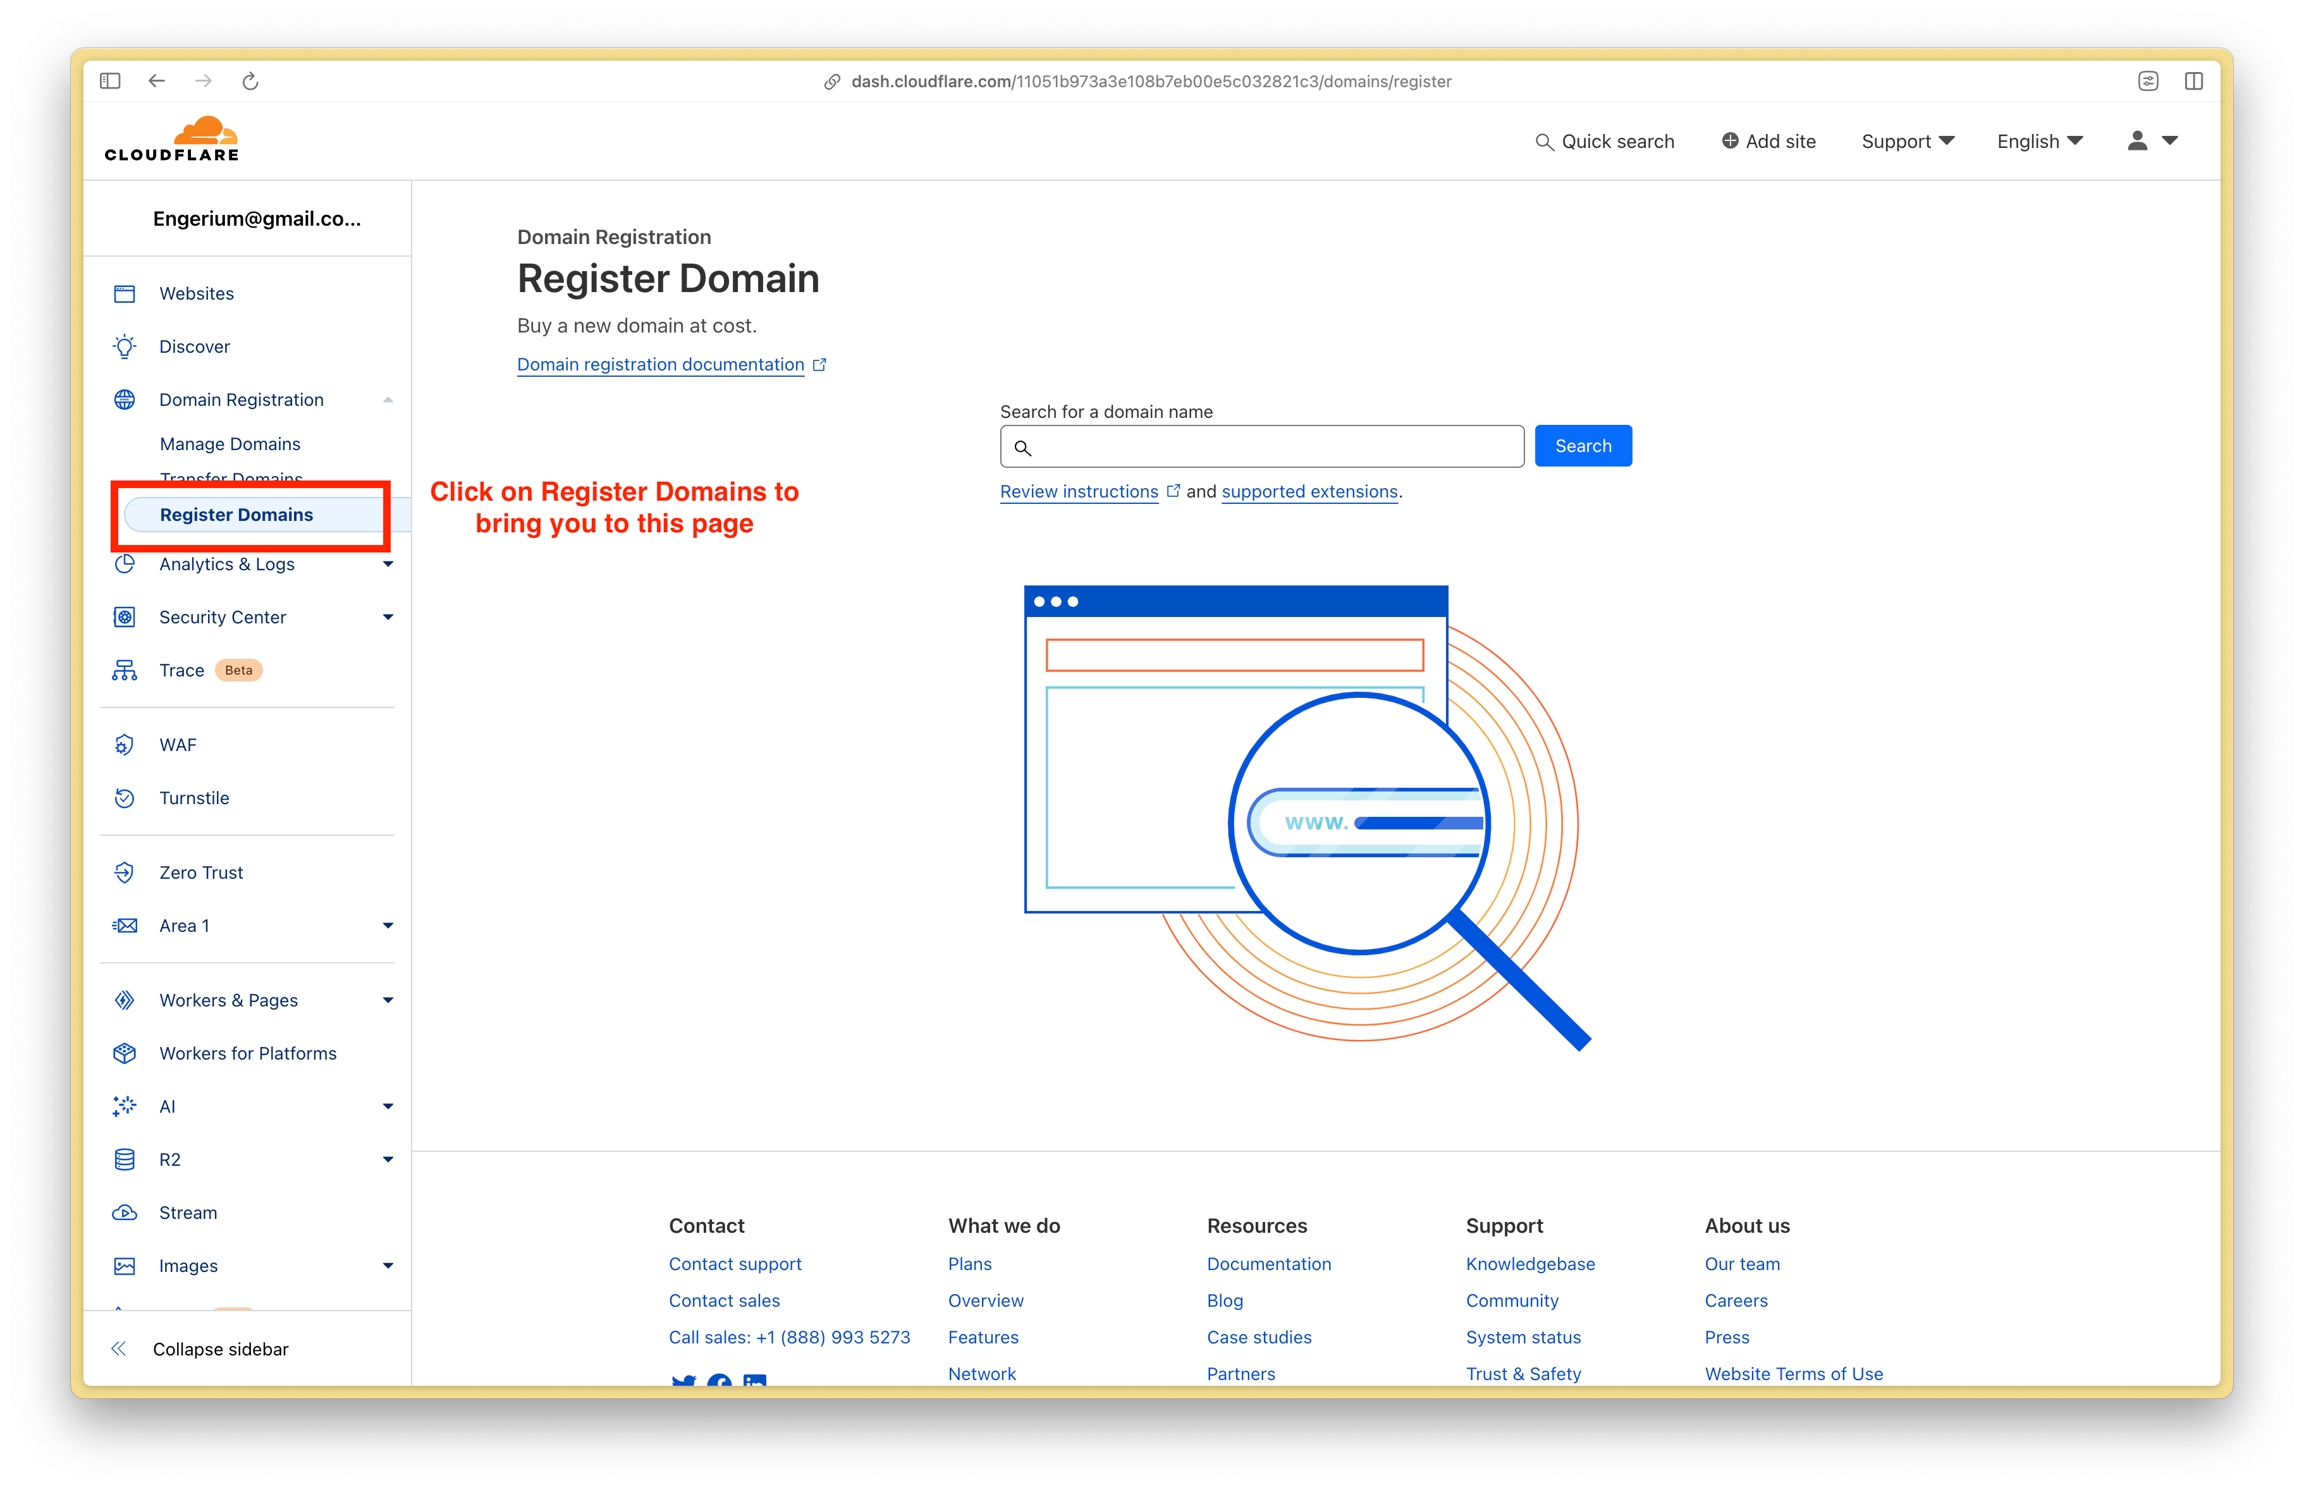
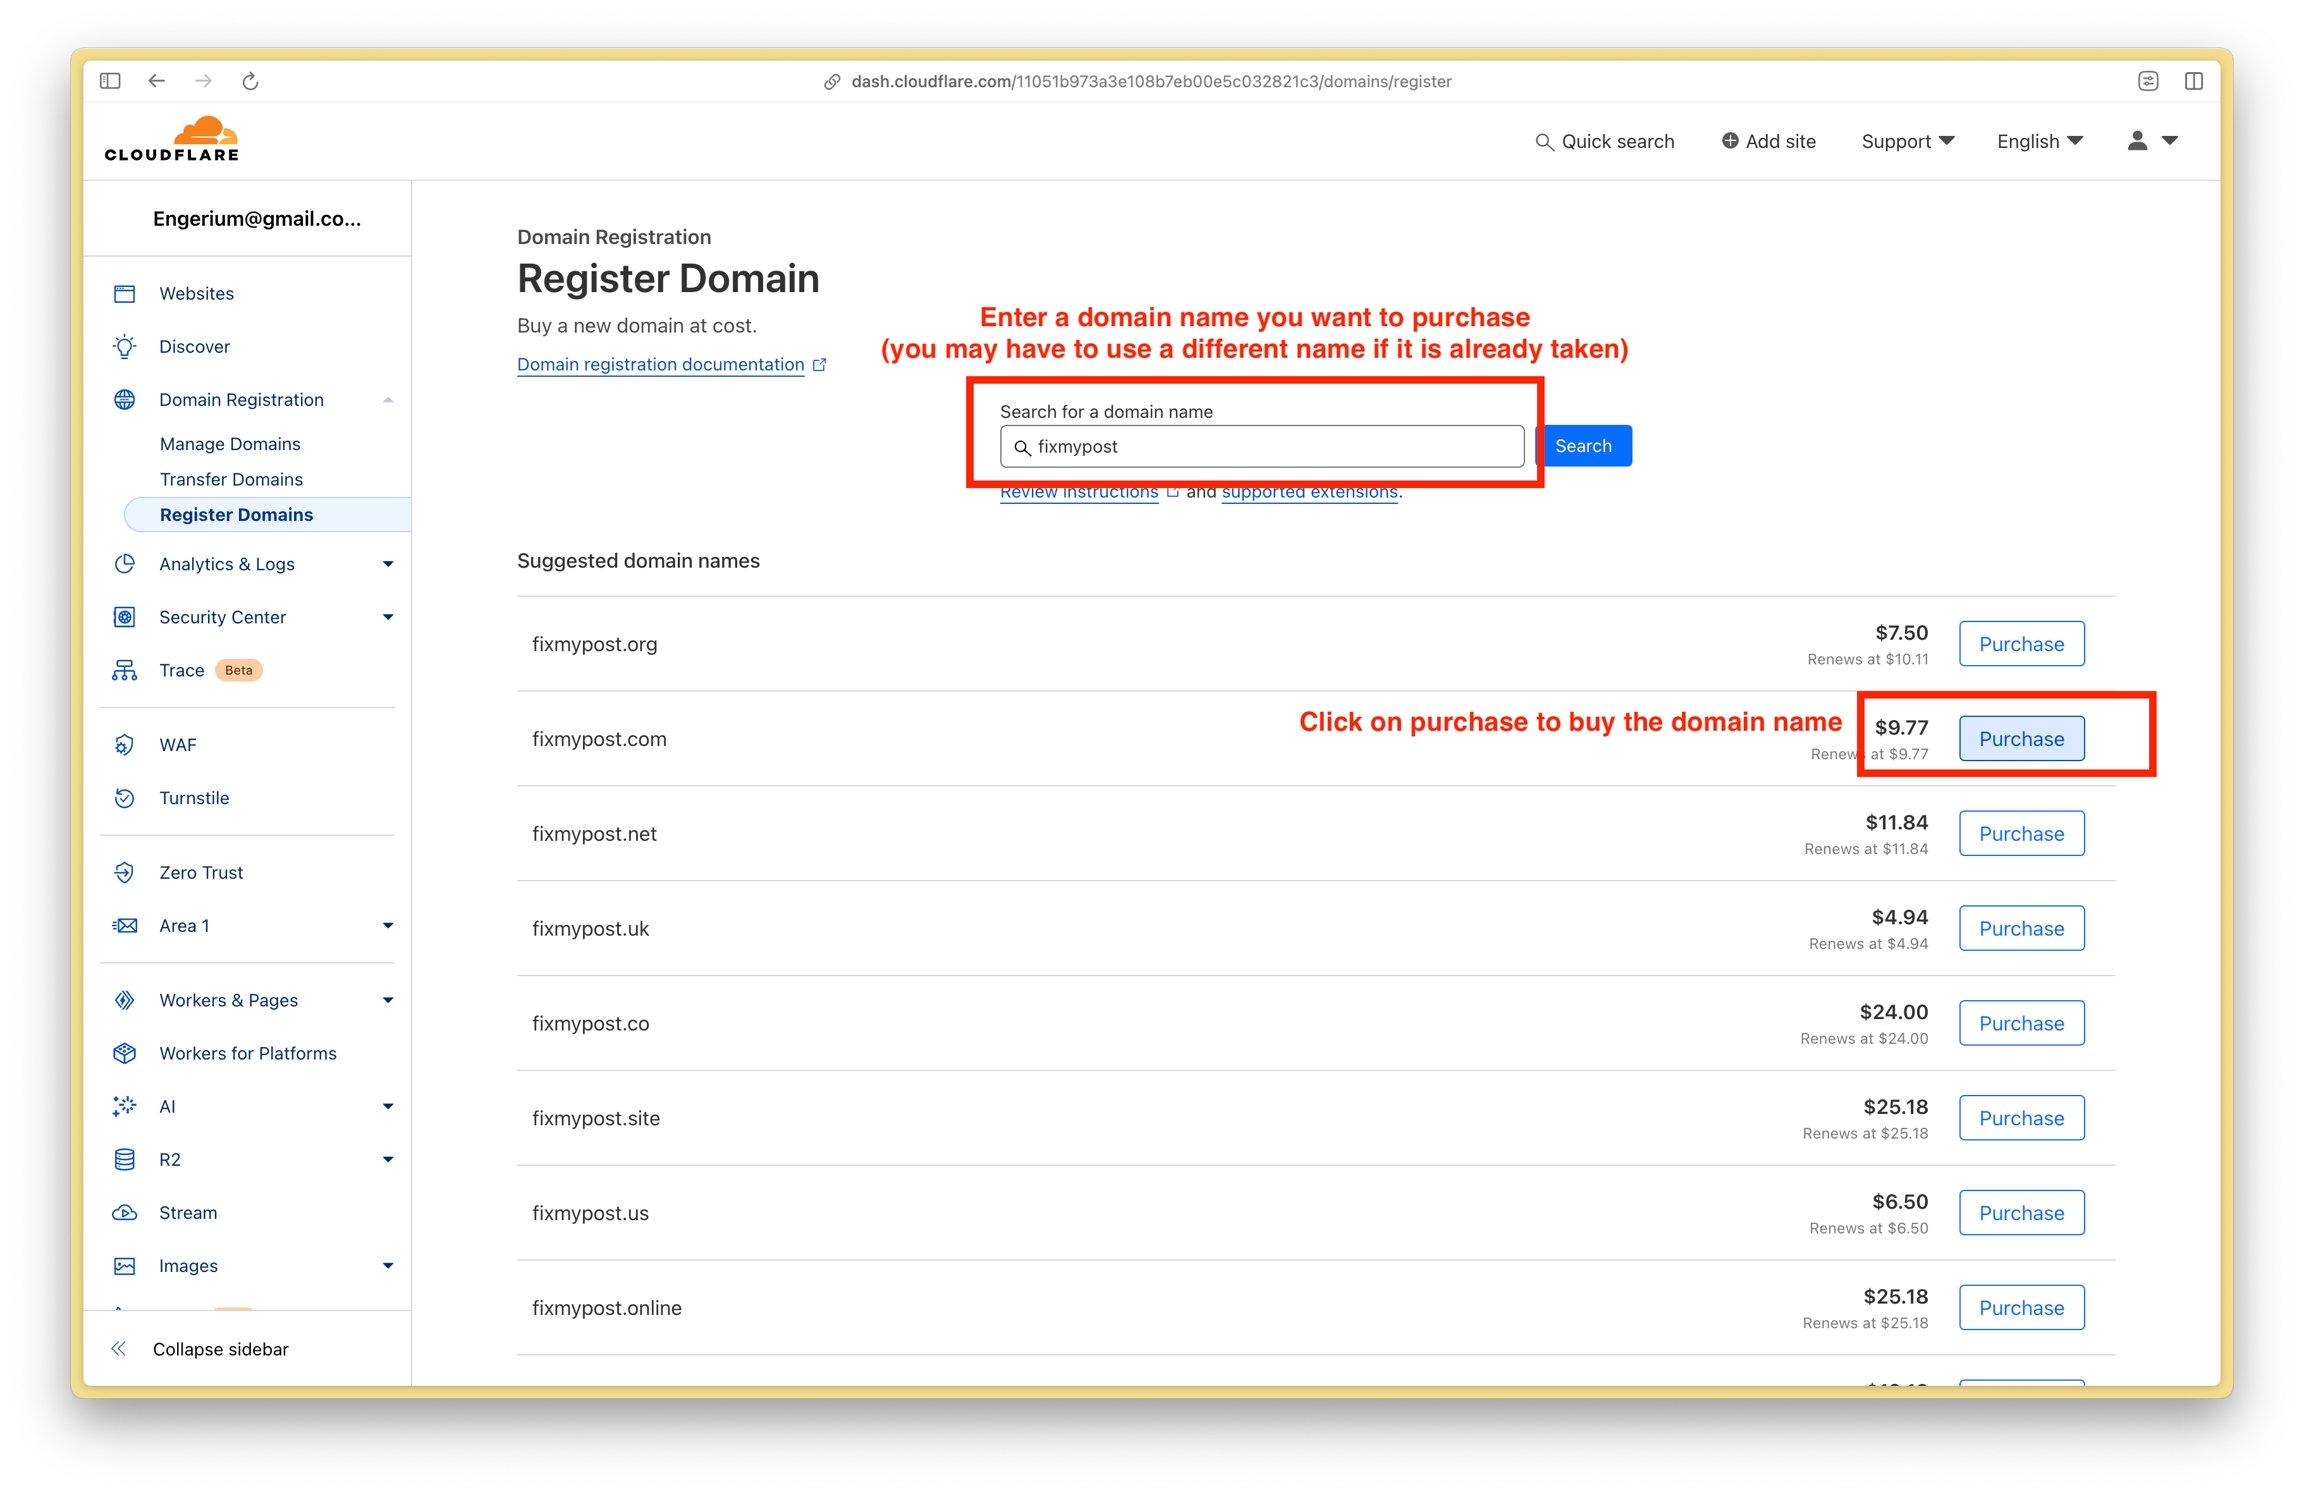
1. Login to Cloudflare Dashboard (dash.cloudflare.com) and click on Register Domains in the sidebar
2. Type in a domain name of your choice and click purchase
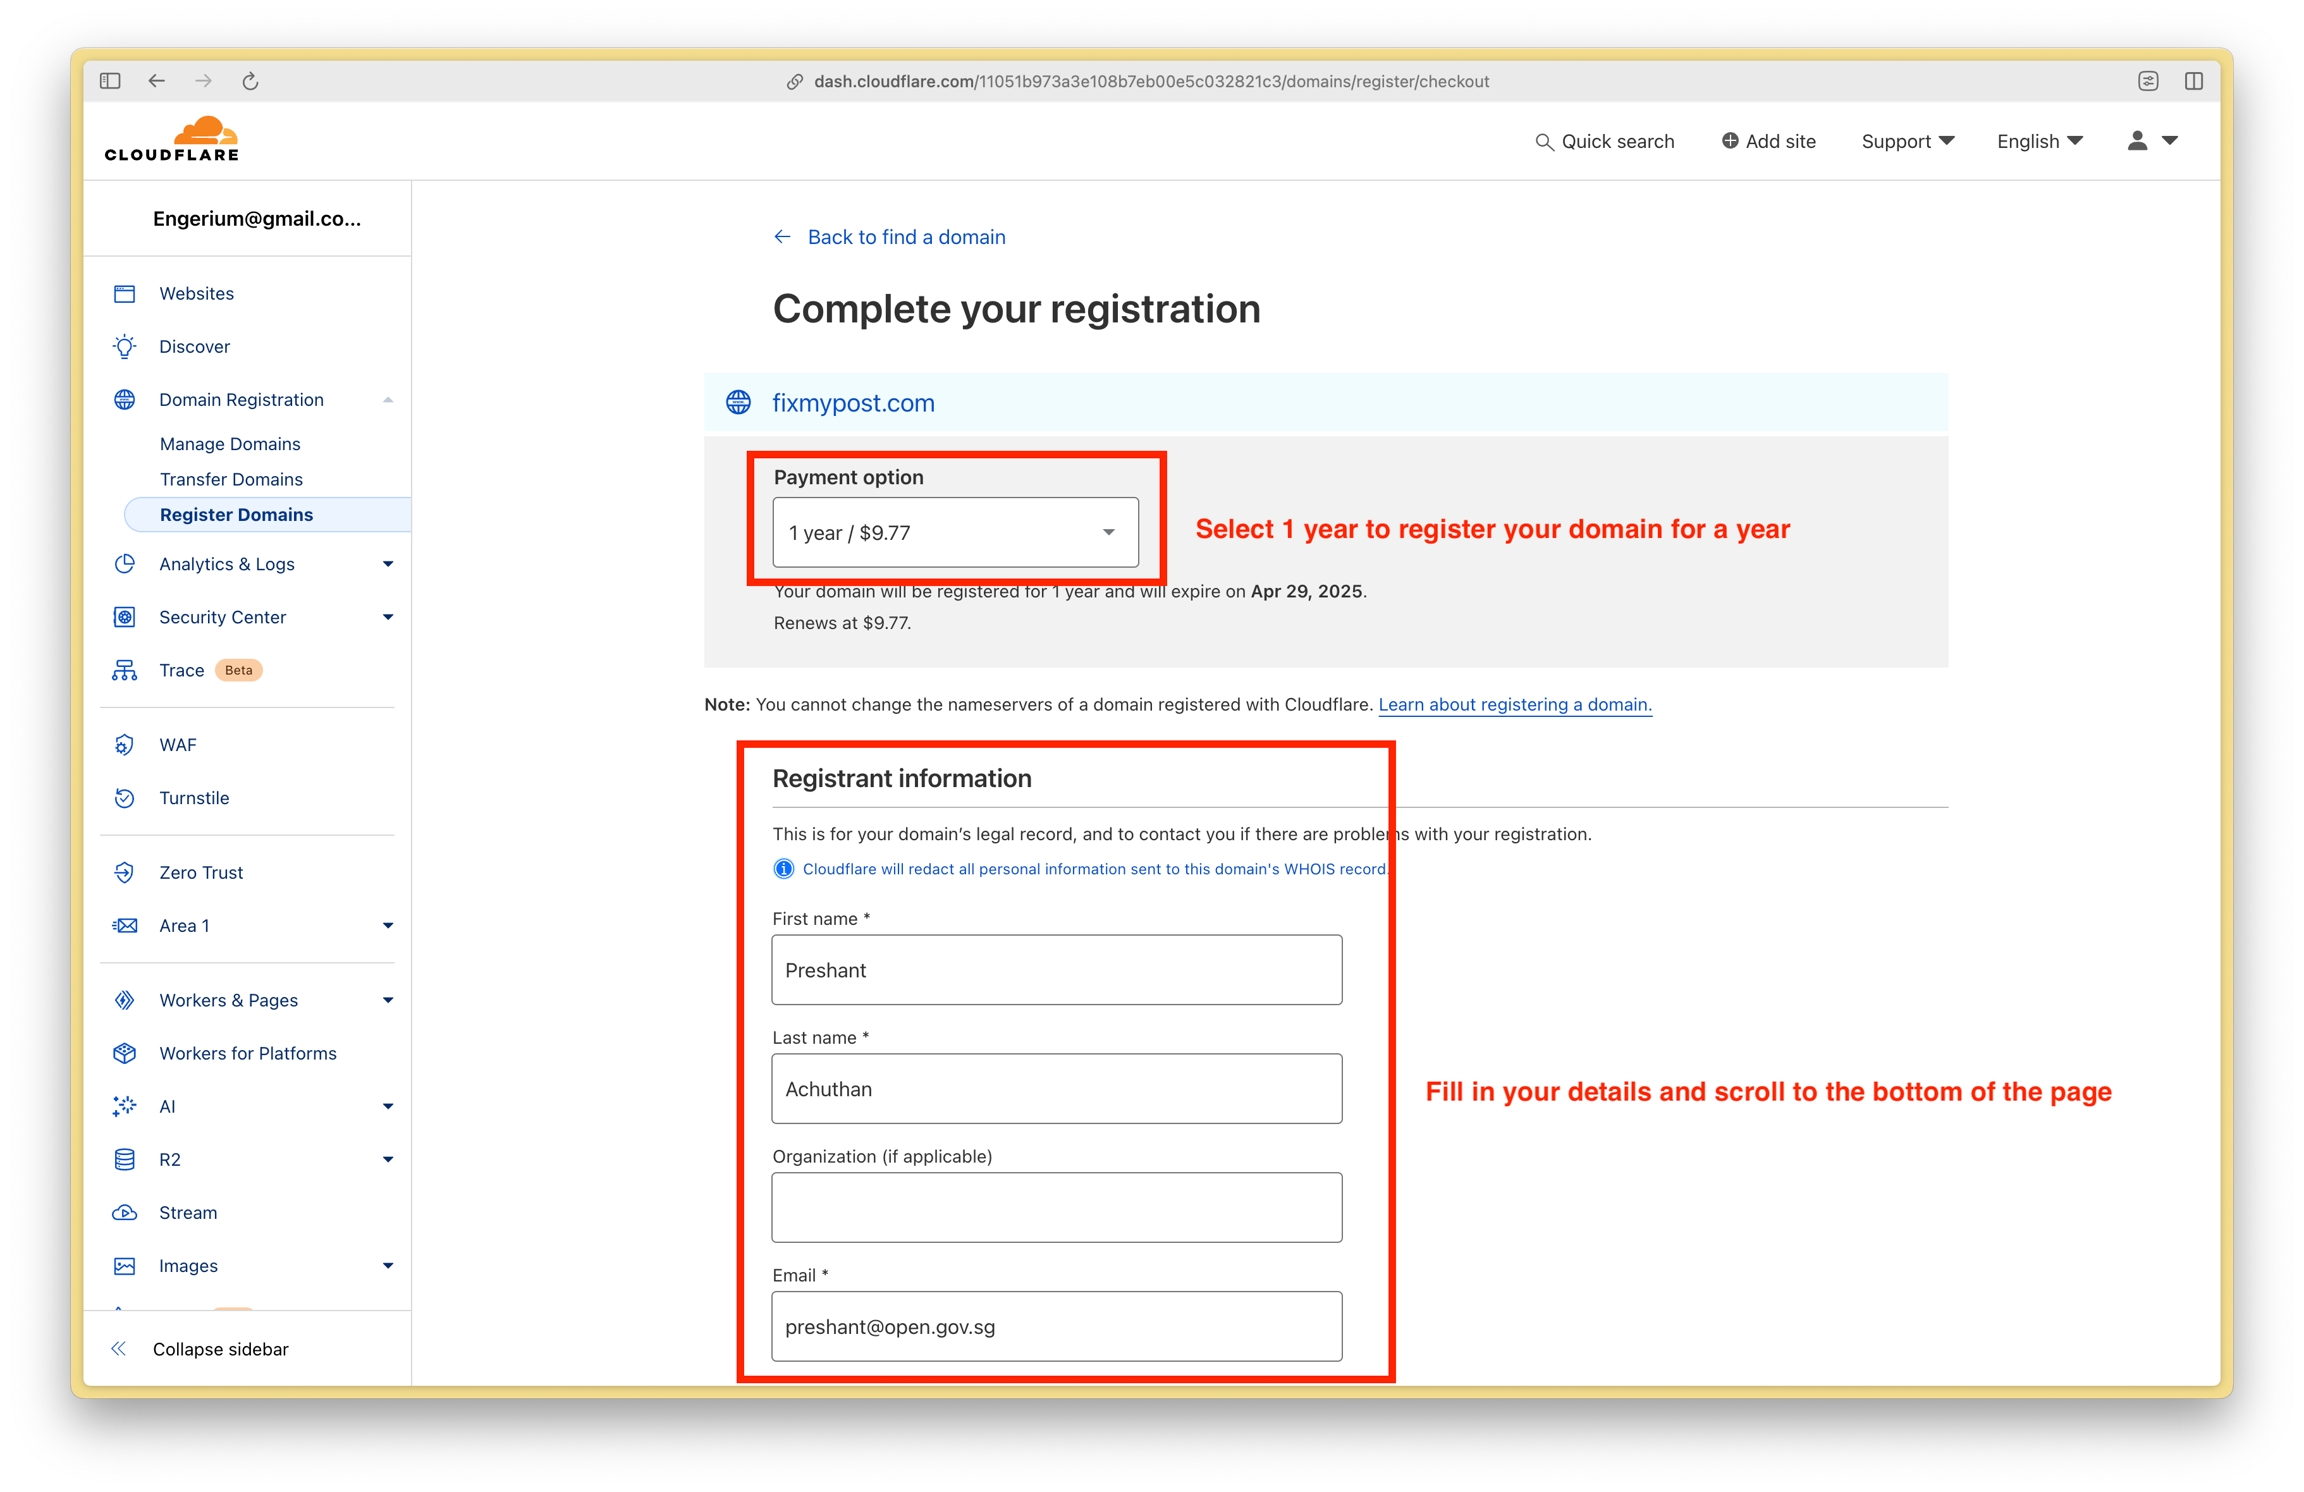
3. Select a 1 year registration and fill in your registrant information
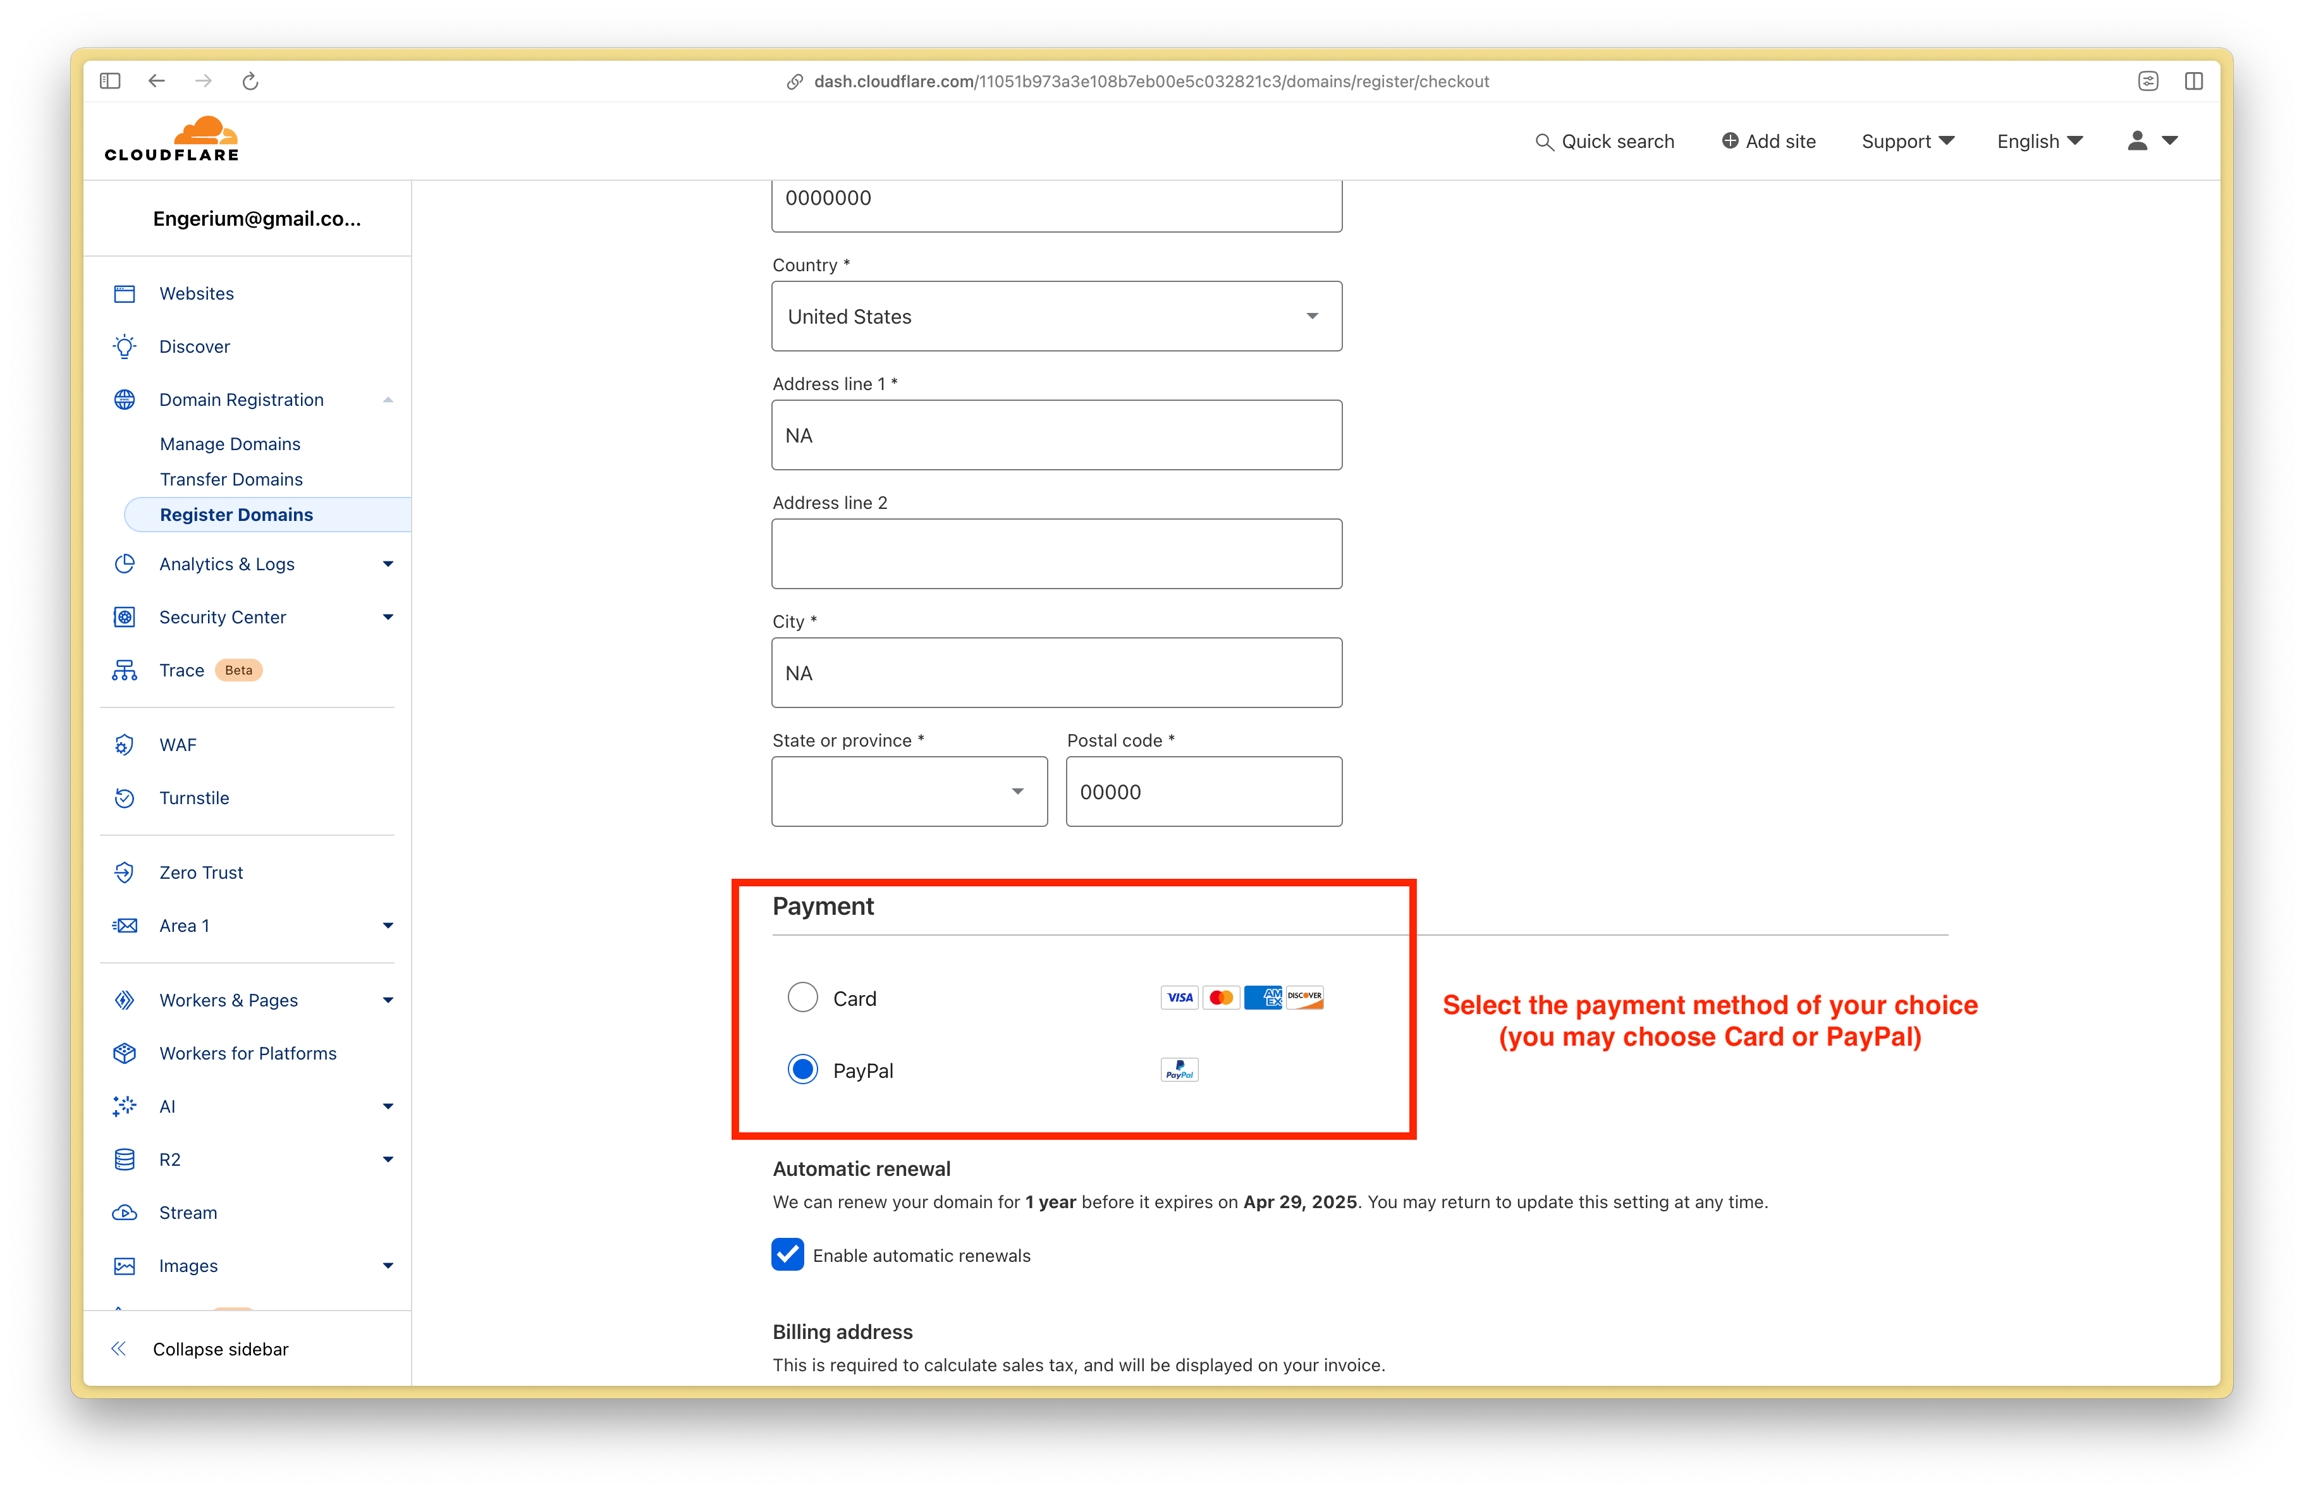
4. Select the payment method of your choice
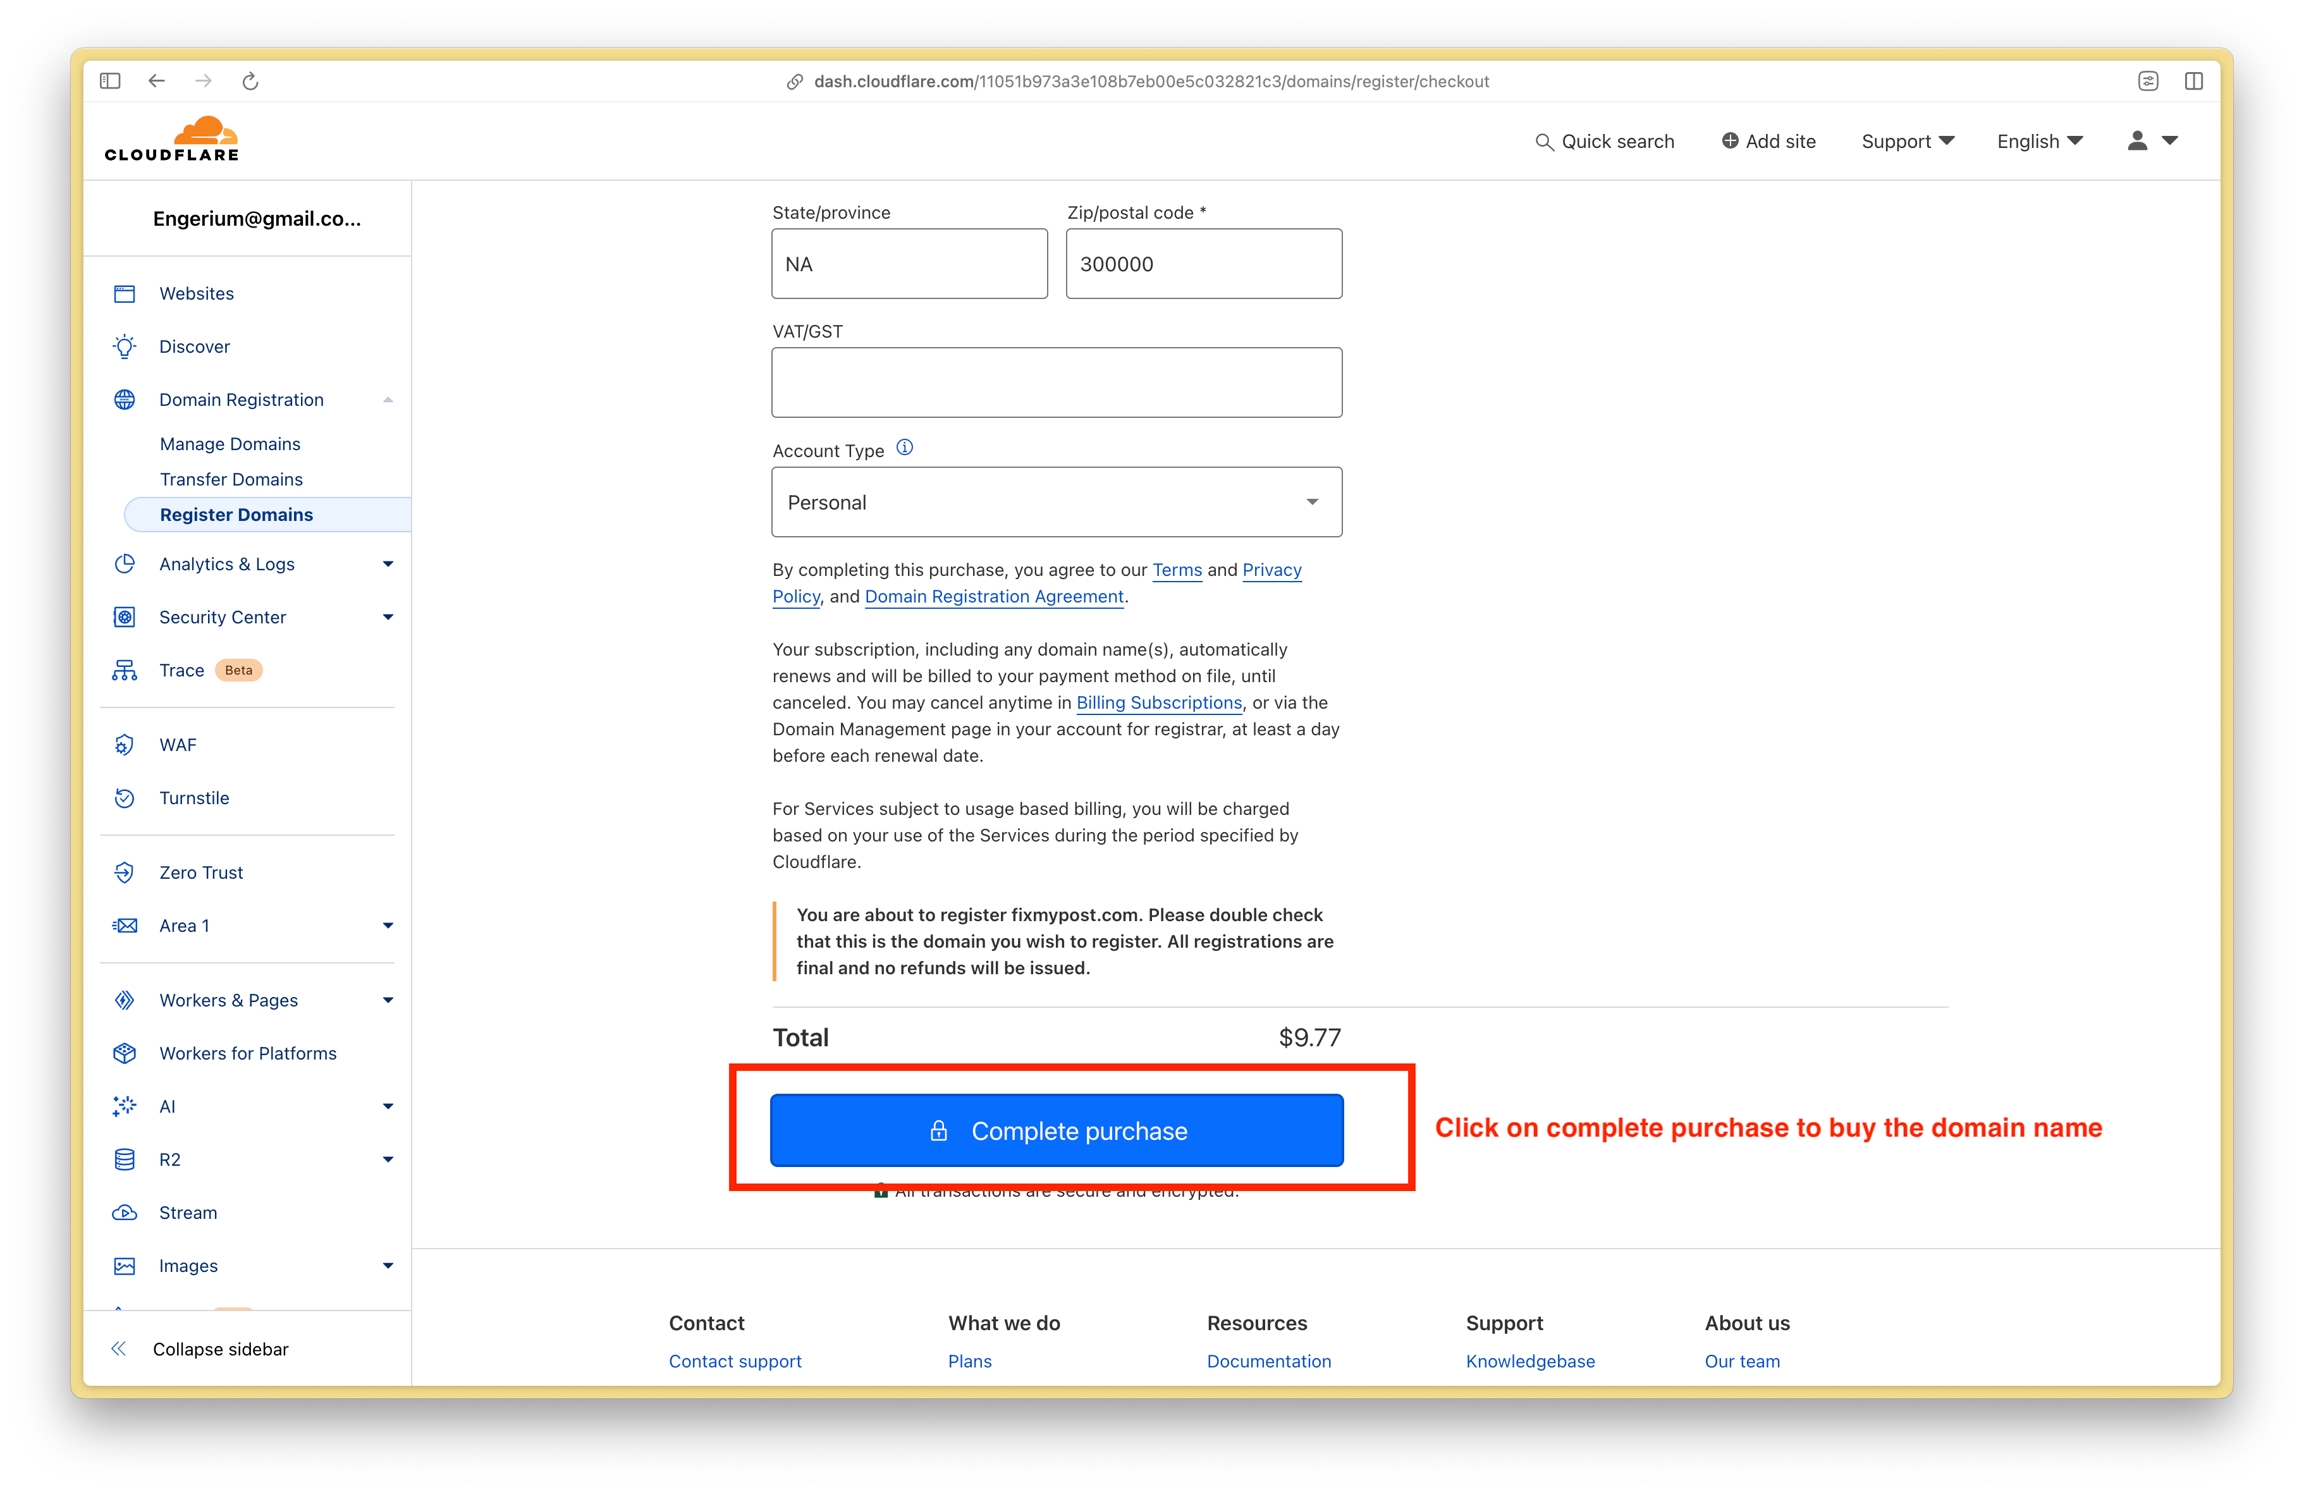
5. Click on Complete Purchase to buy your domain name
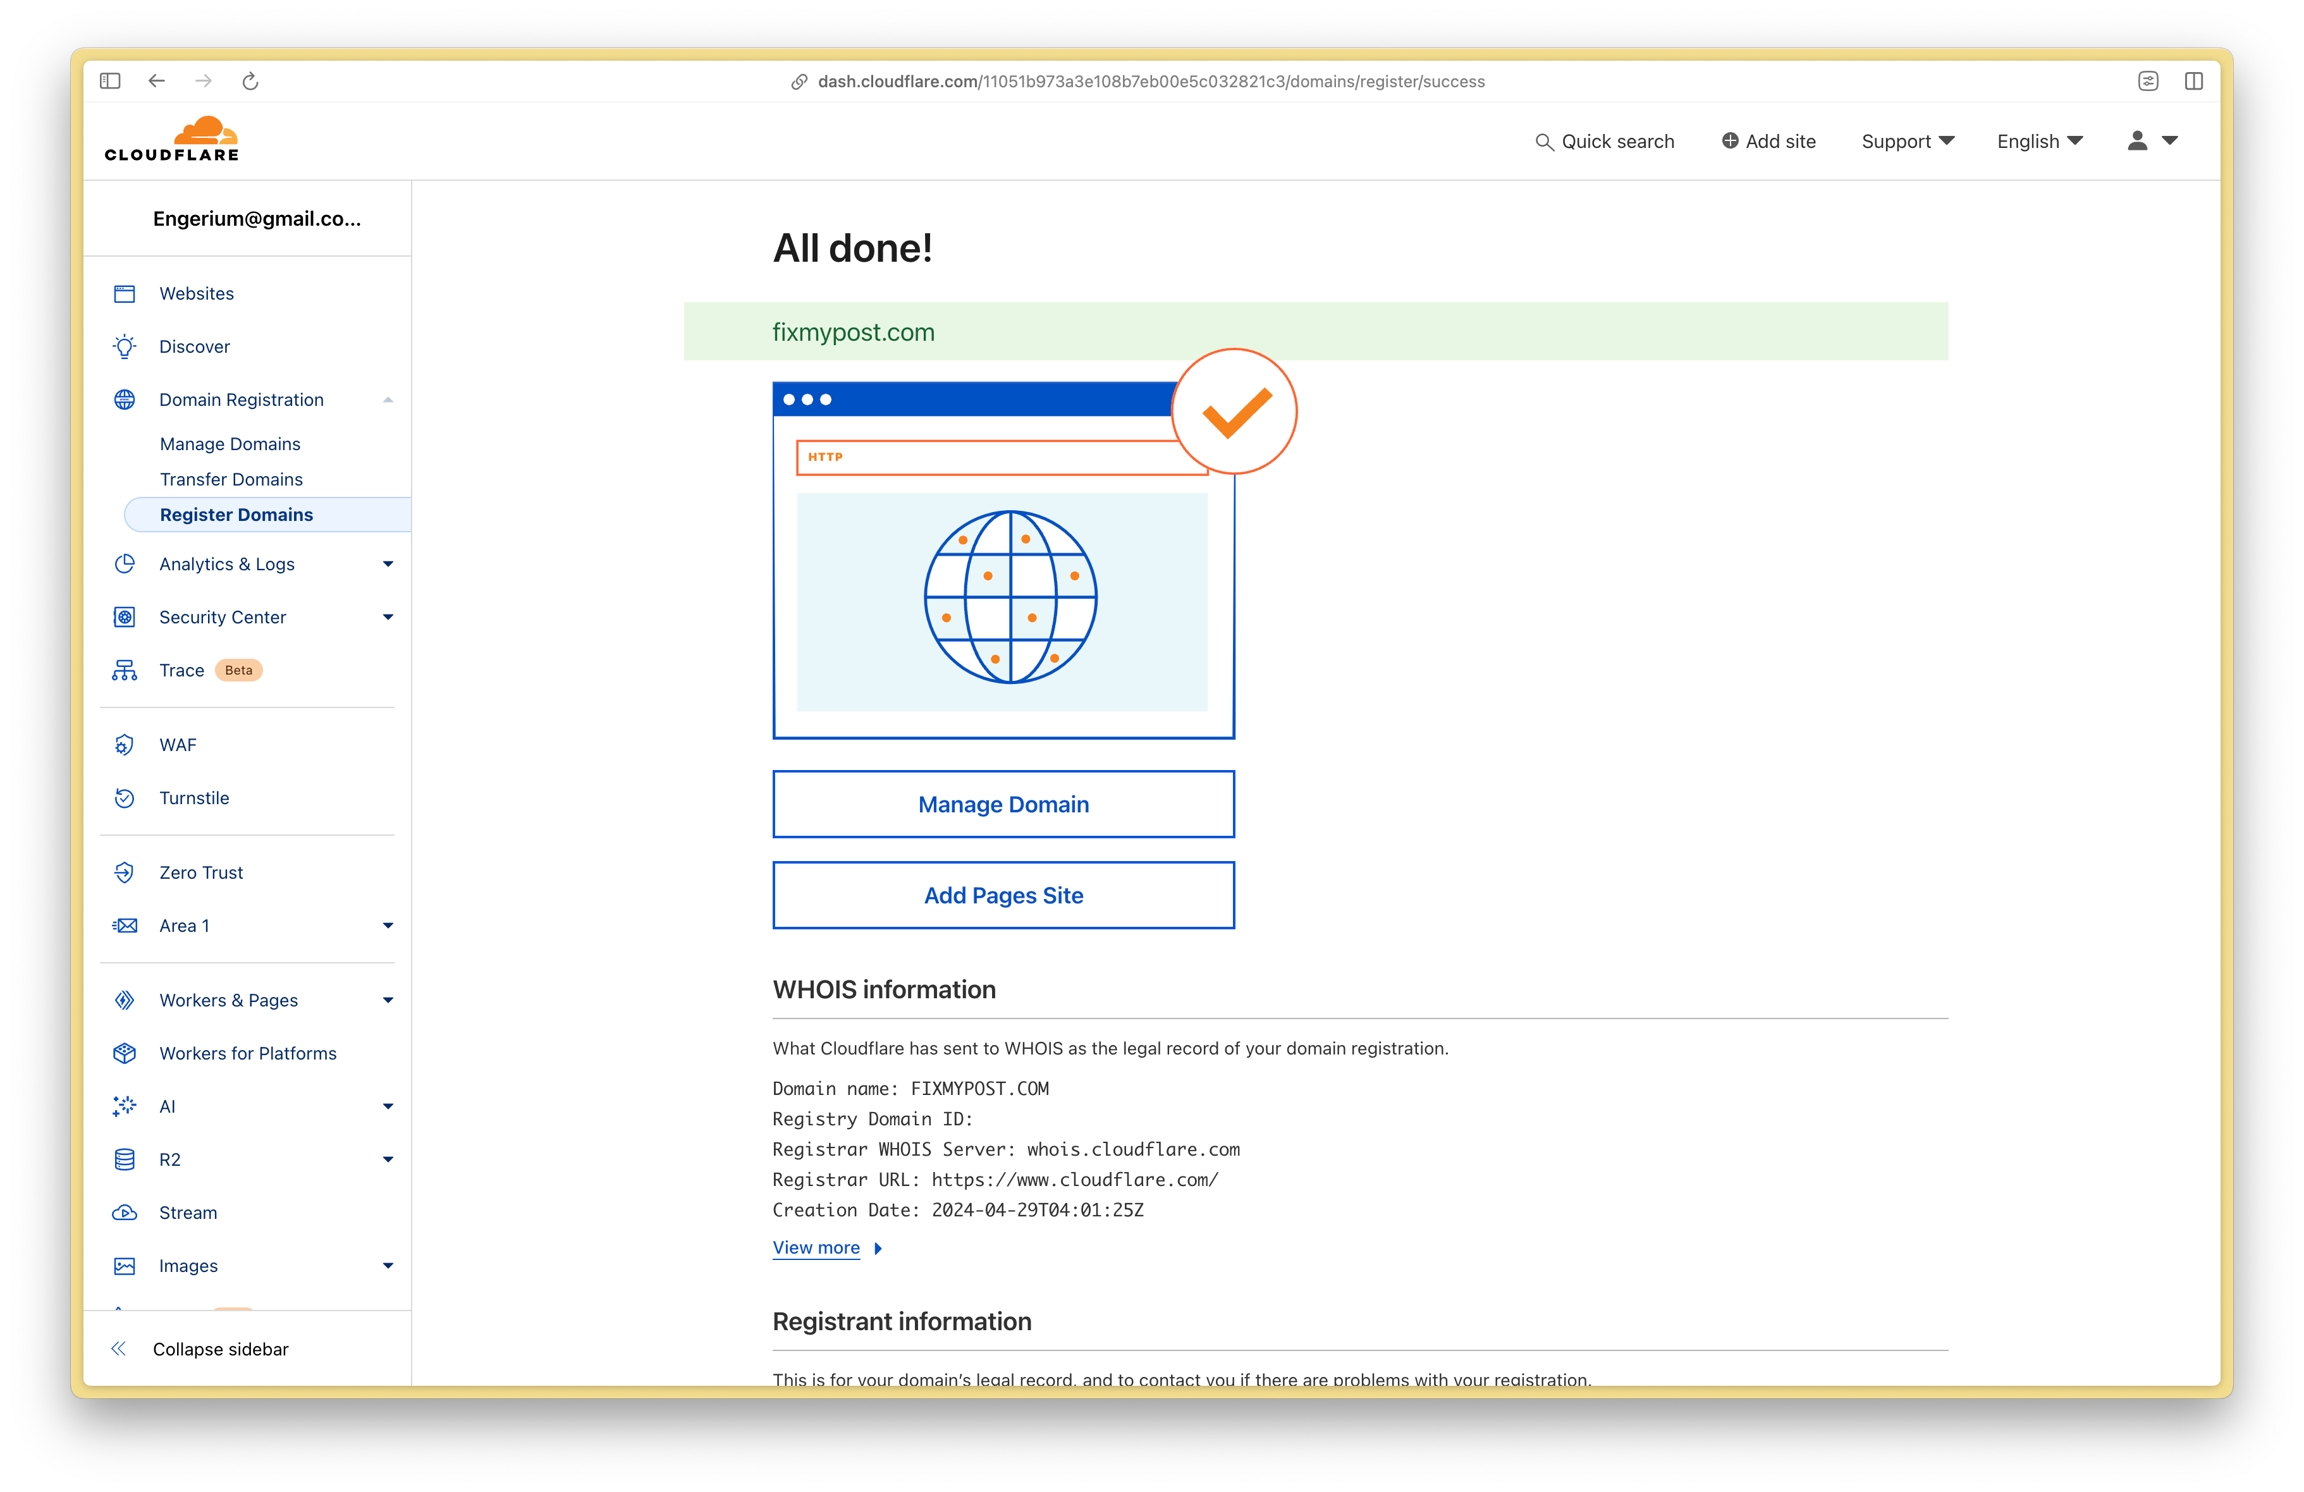
6. Congrats you've just purchased your domain name!
Linking my domain name to my web app (using the Sample Web App as an example)
To link your domain name to the sample web app, there are three things you will need to do:
Enable full SSL/TLS encryption on Cloudflare
Setup Render to use a custom domain name for your Sample Web App
Setup Cloudflare's DNS to point to the Sample Web App deployed on Render
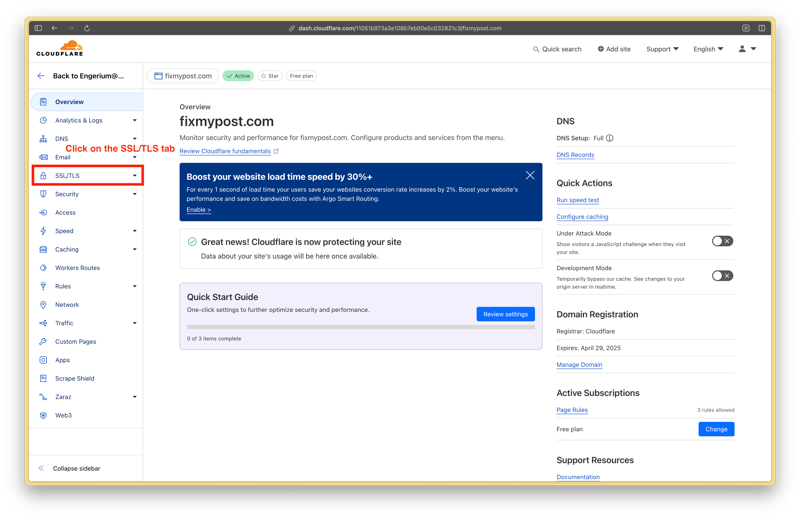
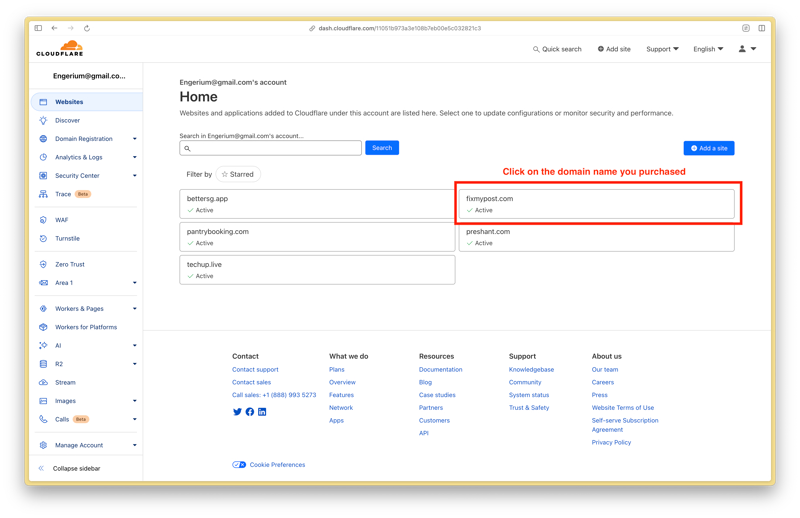
1. Go to Cloudflare Dashboard (dash.cloudflare.com) and click on the domain name you purchased

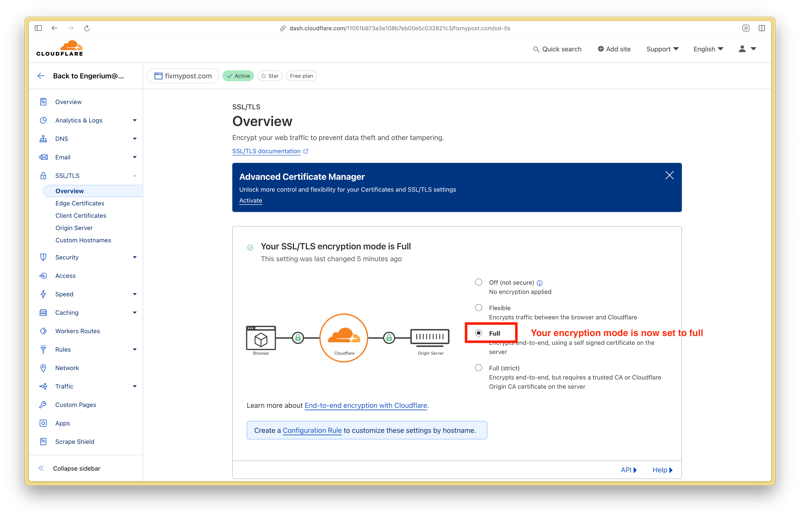
2. Click on the SSL/TLS tab in the sidebar
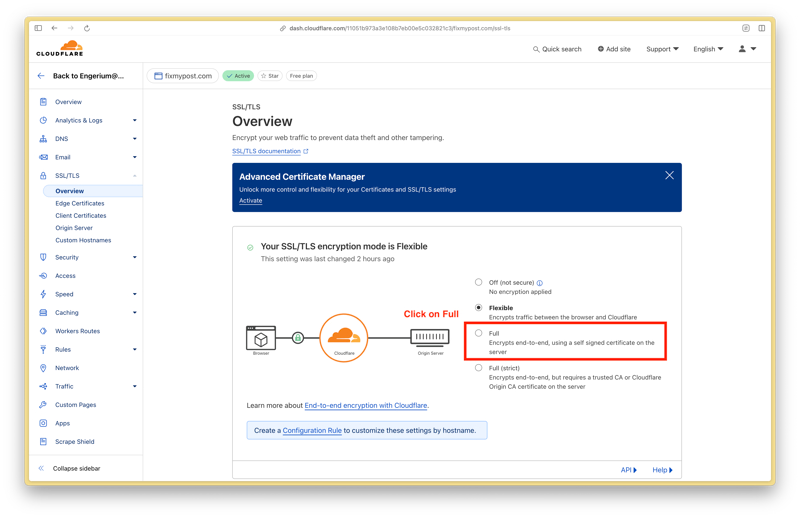
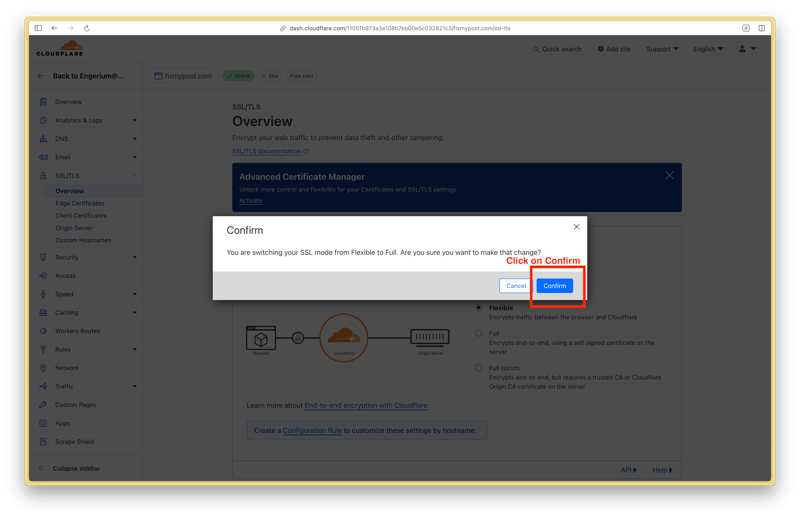
3. Set the SSL/TLS encryption mode to Full
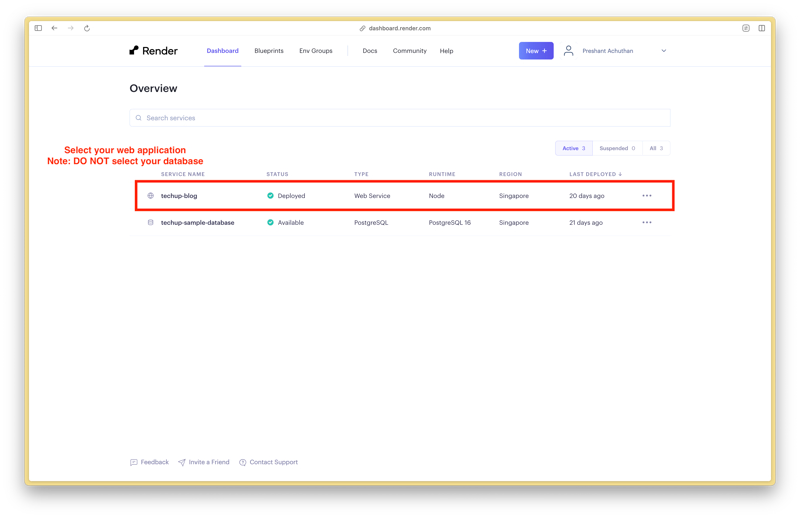
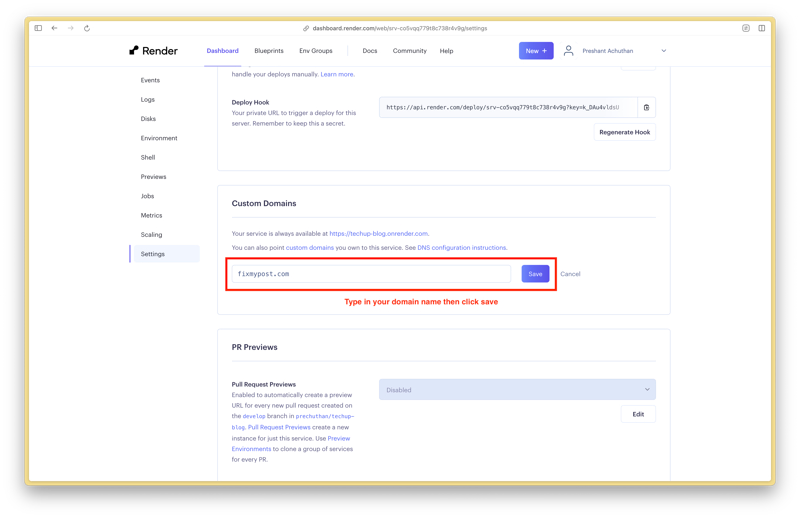
4. Go to Render Dashboard (dashboard.render.com) and click on your web app (in this example the sample web app is selected)
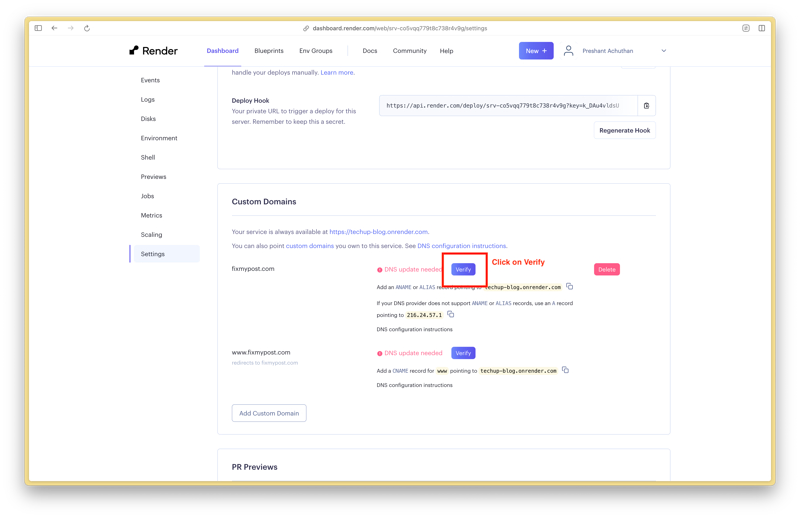
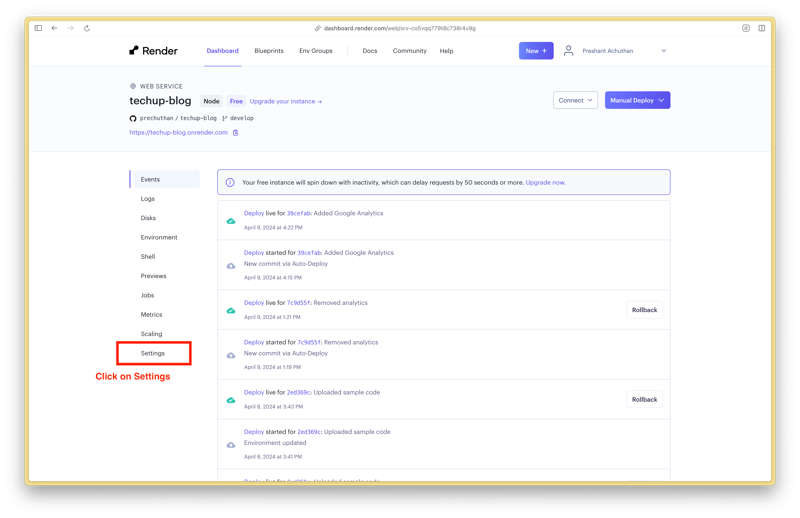
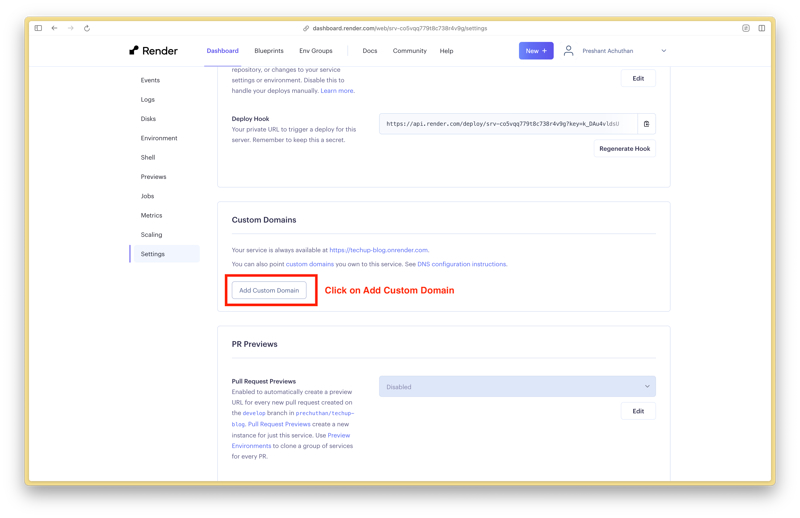
5. Click on Settings to Add a Custom Domain Name
6. Go to Cloudflare Dashboard (dash.cloudflare.com) and click on your domain name
7. Click on DNS to go to the page to edit your DNS Records, then click on Add Record
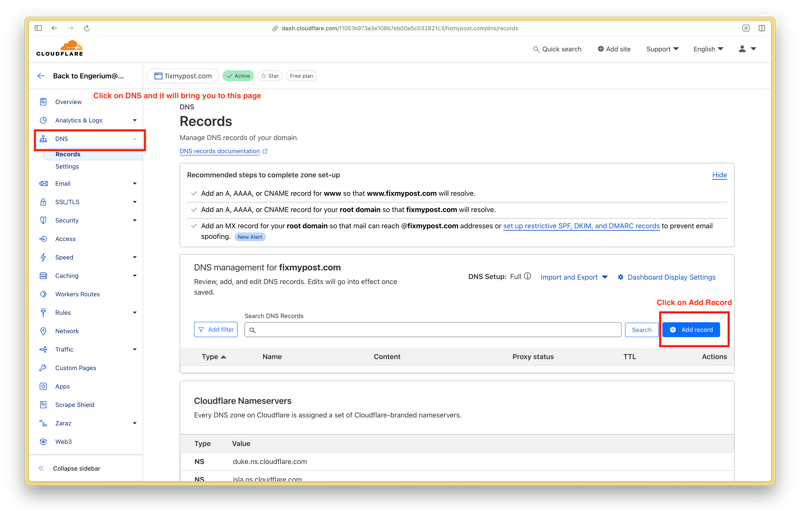
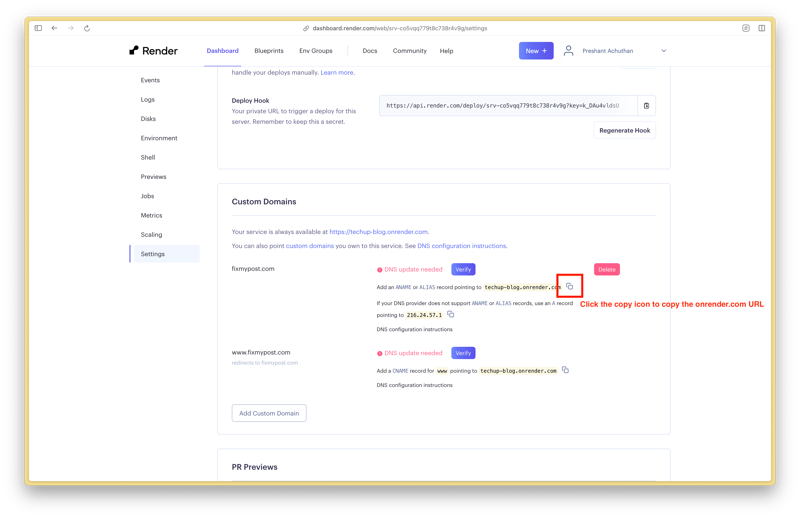
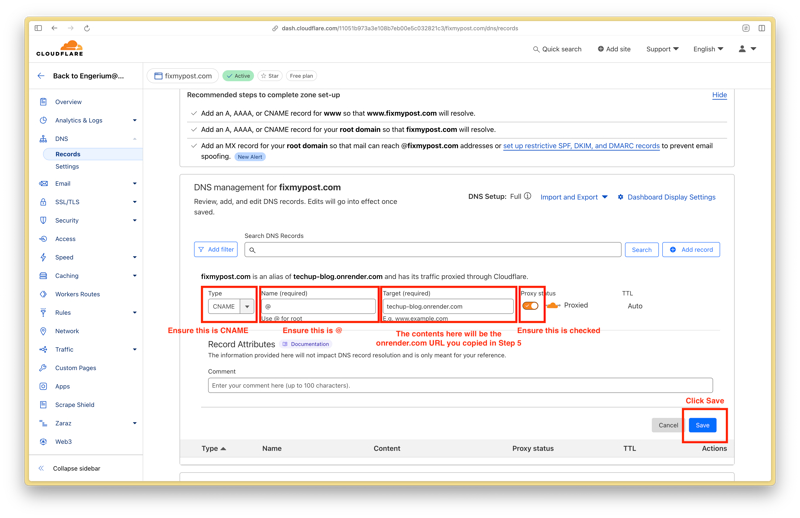
8. Add a new DNS Record
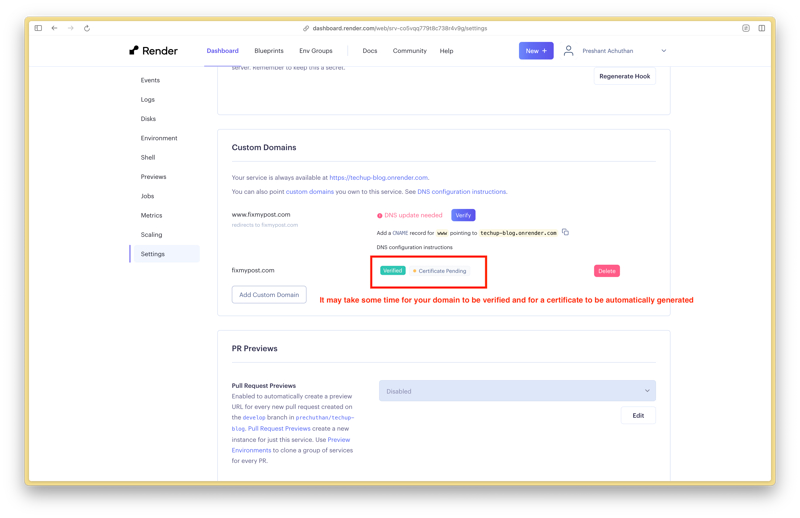
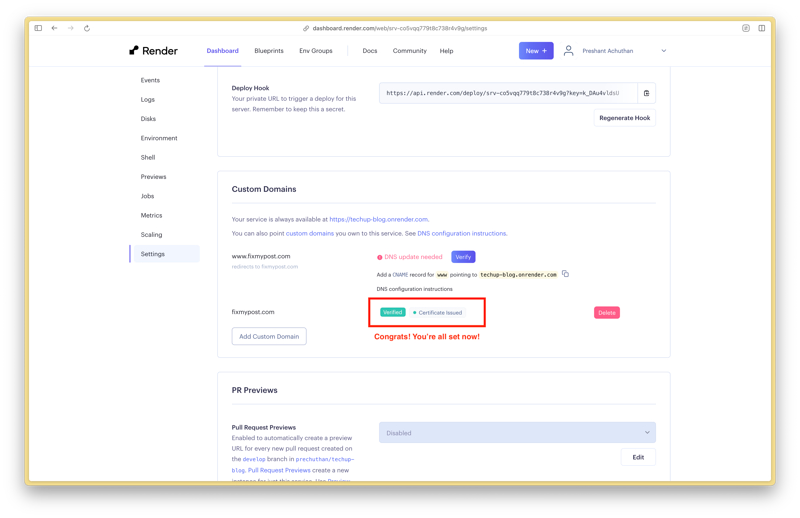
9. Go back to your Render Dashboard and click on Verify