📲Building a Sample Web App
This exercise is required for the hands-on in the Backend workshop (13th May)
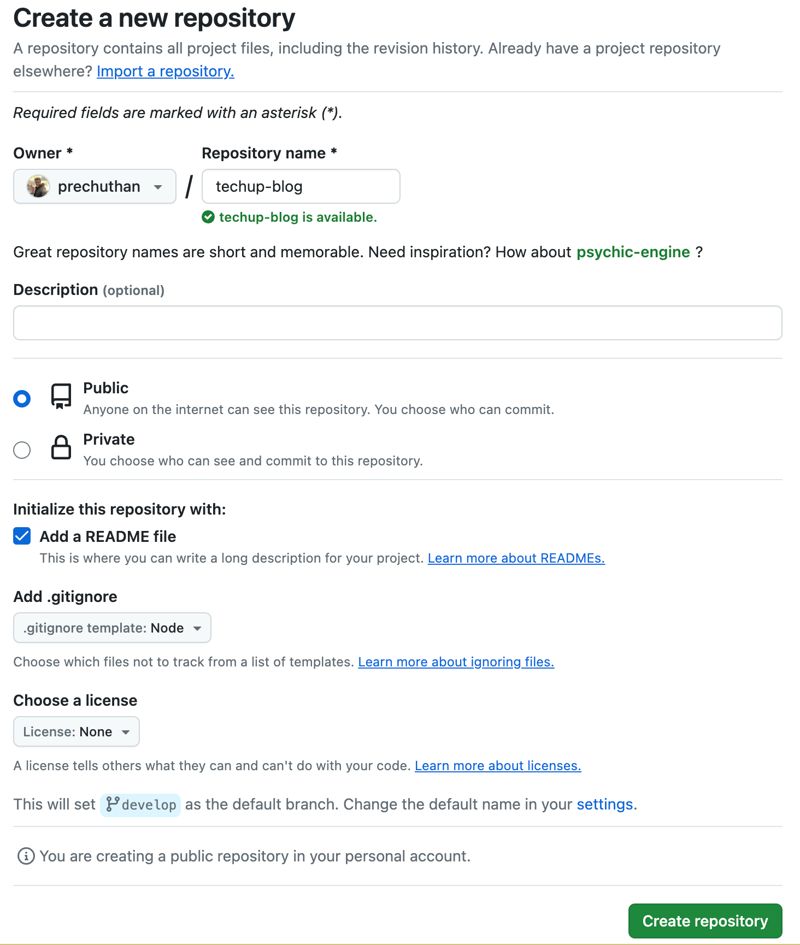
1. Create a new GitHub Repository
Go to https://github.com/new to create a new repository
Type in your own repository name (this could be any name)
The description for your repository can be empty
Your repository should by default be Public
Ensure that you check the "Add a README file"
Ensure that you select Node as the .gitignore template
The license can be at it's default setting of None
Note that your default branch may be called "master" or "main", this is okay and you can leave it (mine is currently set as "develop").
Click on "Create repository" to create your new GitHub Repository
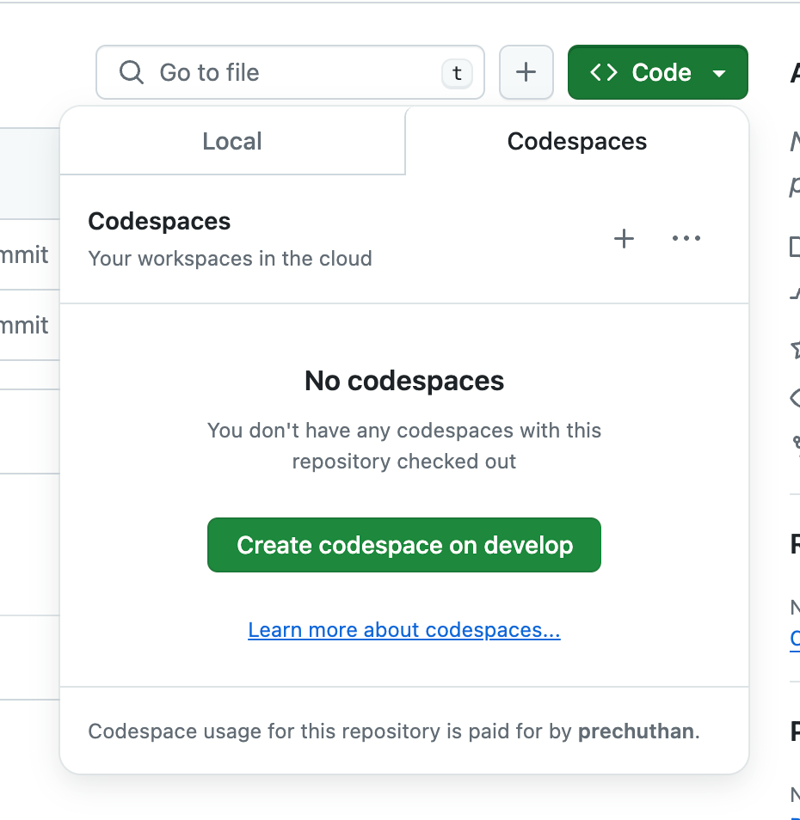
2. Open your newly created repository in Codespaces
You should have been re-directed to your newly created repository
Click on the green "Code" button, select the "Codespaces" tab and click "Create Codespace on develop". (Note: your branch may be called "master" or "main" and this is fine)
3. Download the source code and unzip the file
Your GitHub Codespace should have opened up in a new tab after creating a codespace in the previous step.
Click on the link below to download the source code for the sample app here and unzip the file:
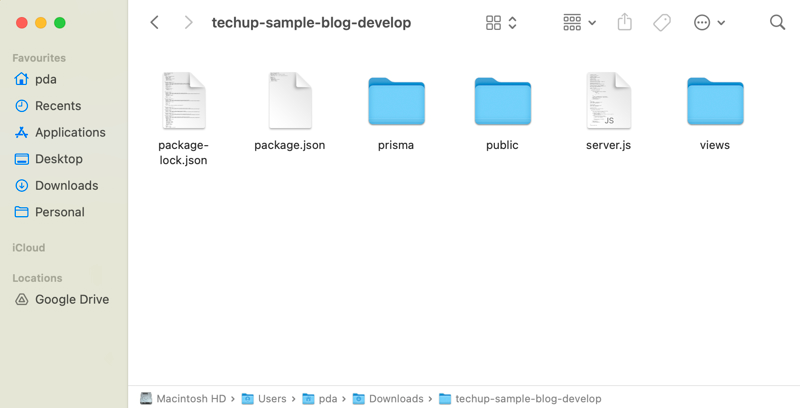
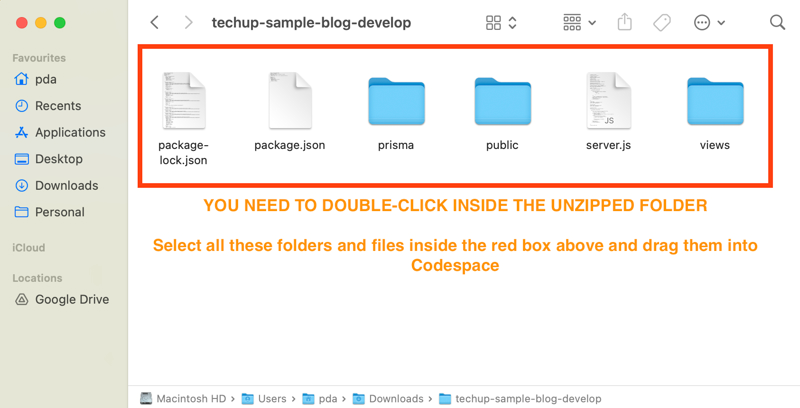
4. Drag and drop sample app code into Codespaces
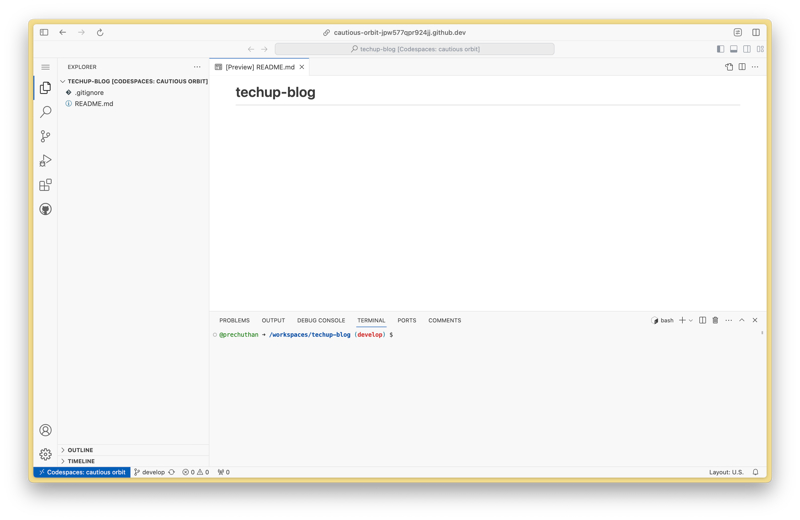
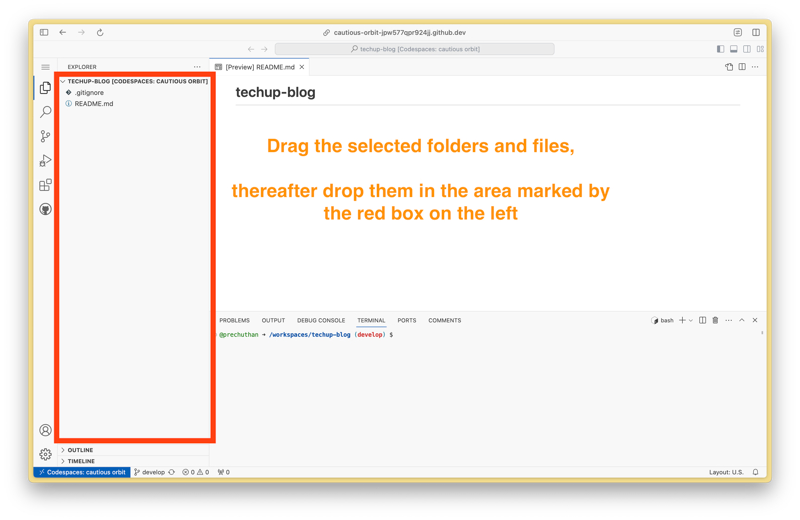
After completing Step 2, a new tab should have opened with your Codespace similar to the image shown below.
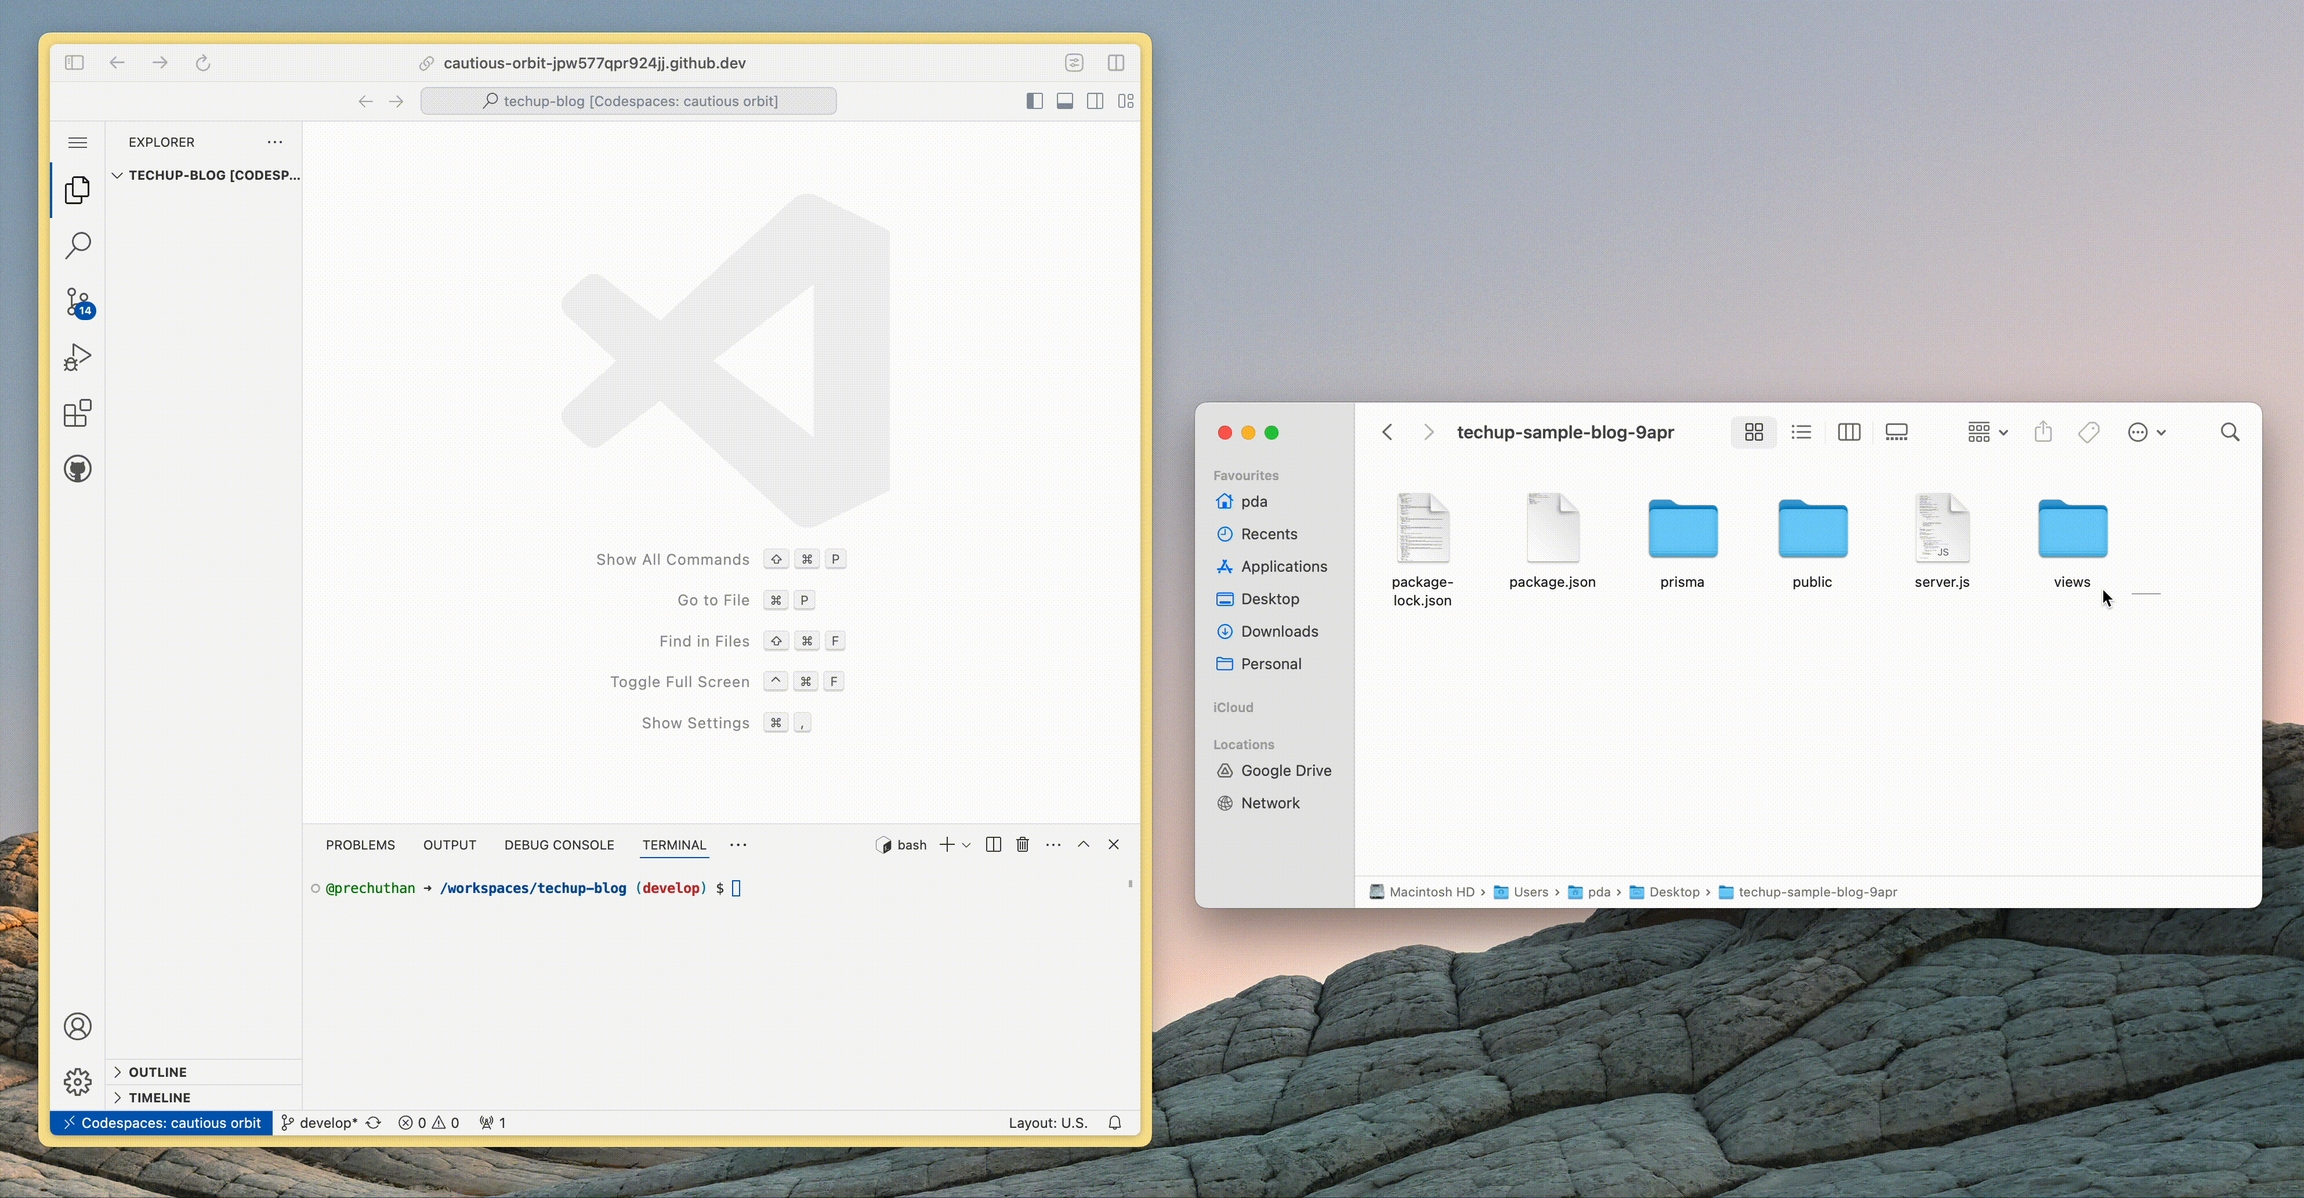
Drag and drop all files and folders in Step 3 into the sidebar of your Codespace. IMPORTANT: Ensure that you select all the files and folders INSIDE the unzipped file, do not upload the whole zip file (see the below images if you are unsure).
This uploads the sample web app source code to your Codespace
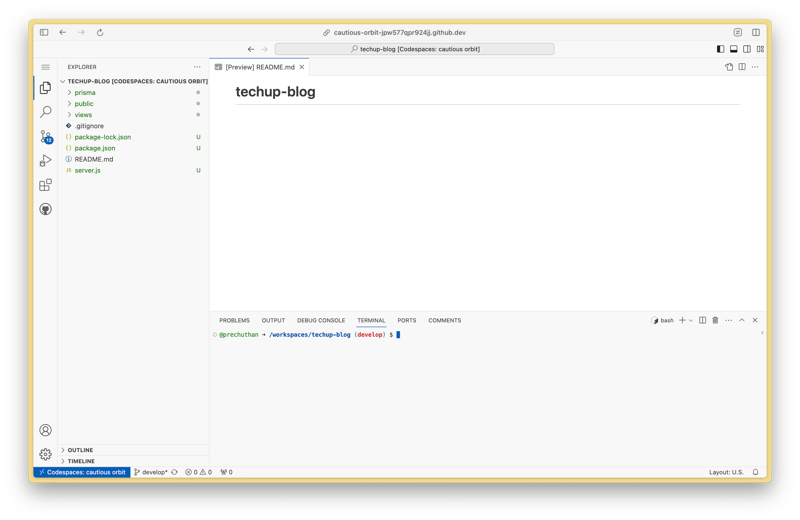
After dragging and dropping, your Codespace should look like this with the following files in the sidebar
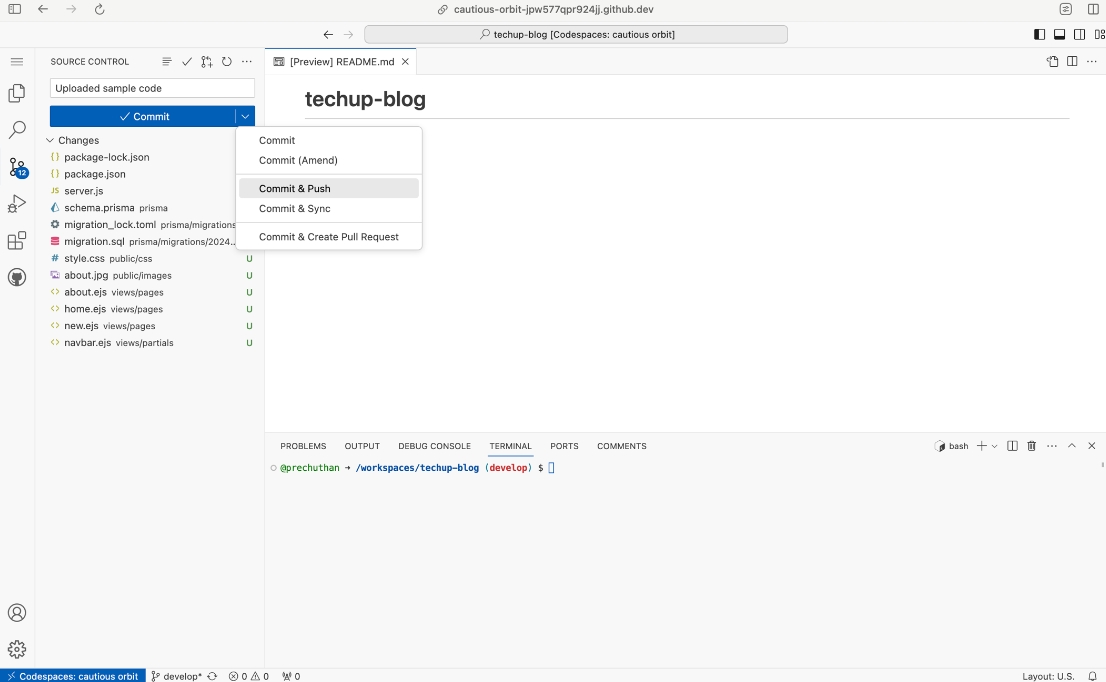
5. Commit & Push to your repository
Click on the Source Control icon (the icon which has blue numbers on it, in the image above it's the third tab on the left)
Enter a commit message of "Uploaded sample code"
Click on the dropdown next to "Commit" and click on "Commit & Push".
Note that you will have to click on the drop down arrow for "Commit & Push" to show up
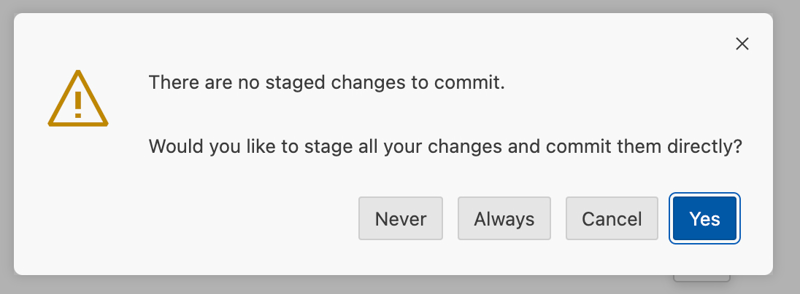
If the following pop-up appears, select "Always"
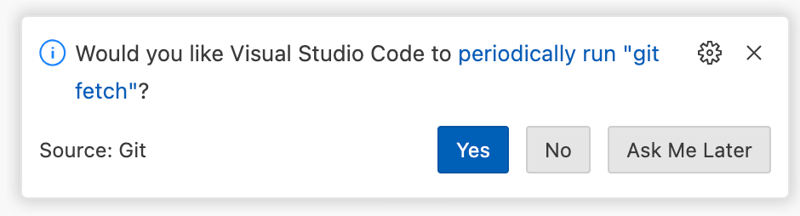
Another pop up may appear at the bottom right of your screen, select the option of "Yes"
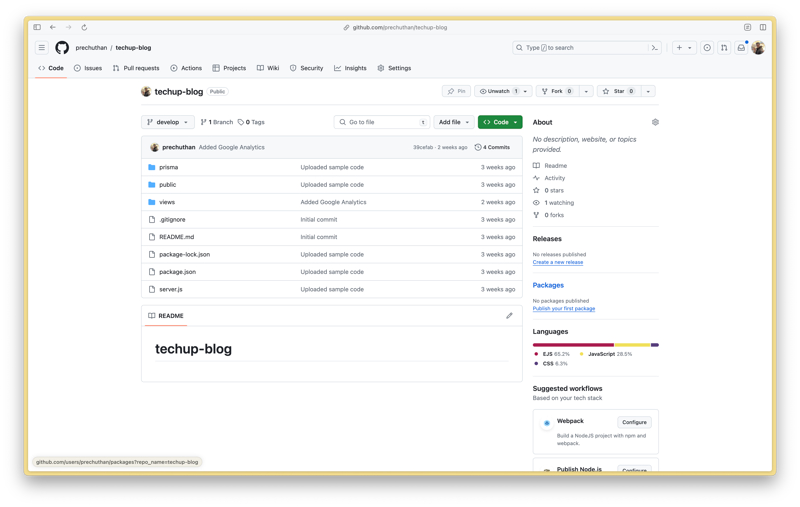
Check that your files are in your GitHub repository by going to https://github.com and selecting the repository you created in Step 1
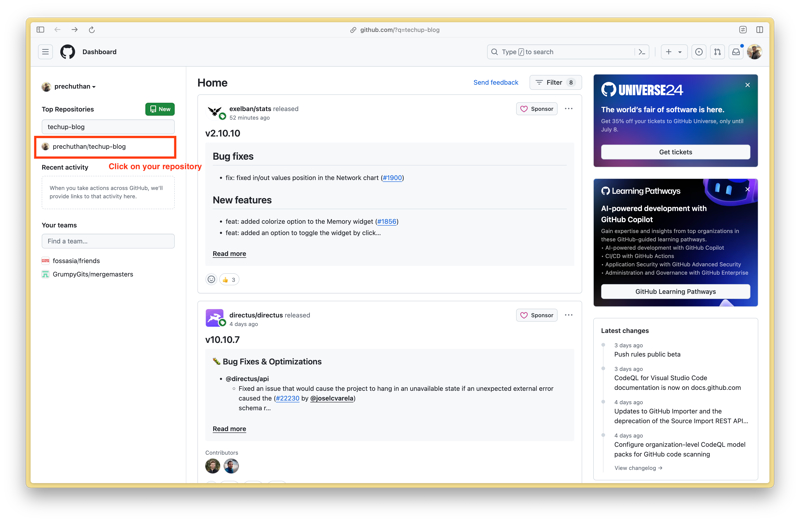
You should now see that there are the newly uploaded files in this repository
6. Create a new PostgreSQL database on Render
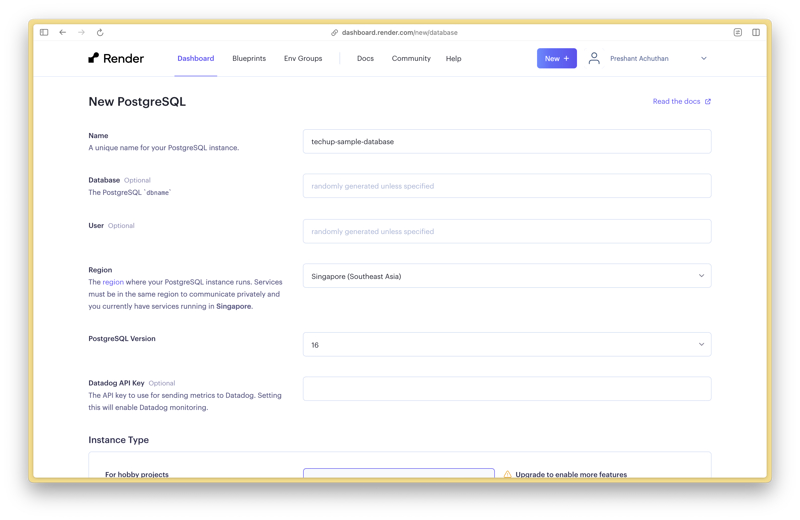
Go to https://dashboard.render.com/new/database to create a new PostgreSQL database on Render.
Type in a Name for your PostgreSQL instance (I've named mine techup-sample-database)
Leave the Database field blank
Leave the User field blank
Change the Region to "Singapore (Southeast Asia)
Leave PostgreSQL Version as the default value of 16
Leave the Datadog API Key field blank
Change your instance type to FREE
Click on "Create Database"
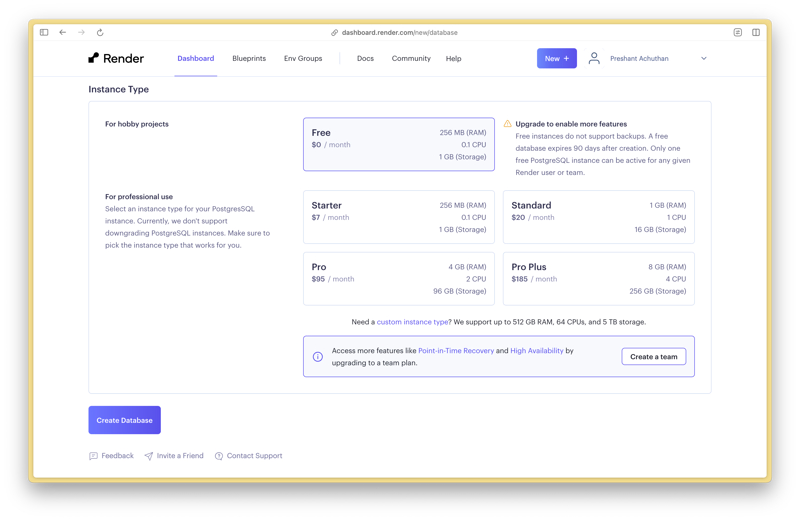
Your database should now be created (after about 30 seconds)
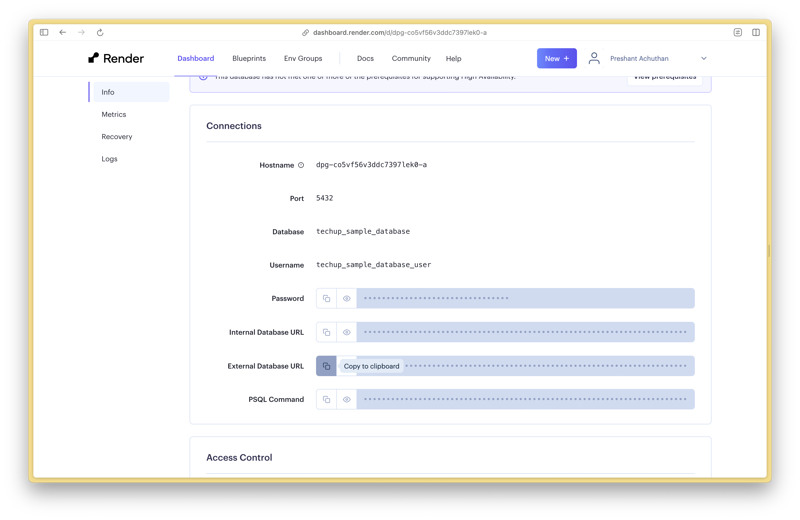
Scroll down to the section on Connections and take note of the
External Database URLCopy this
External Database URLto a blank word document (or anywhere else such as Notepad) as you will be using it later to add it as an environment variable.IMPORTANT: PLS ENSURE YOU HAVE COPIED THIS URL AS YOU NEED IT LATER.
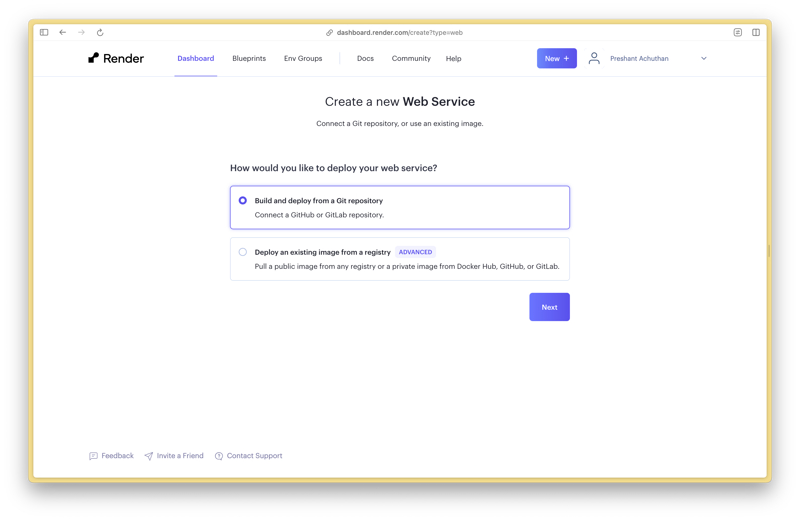
7. Create a new Web Service on Render
Go to https://dashboard.render.com/create?type=web to create a new Web Service (alternatively you may also click on the purple New + button at the top of the page and select Web Service)
Ensure "Build and deploy from a Git repository" is selected then click Next
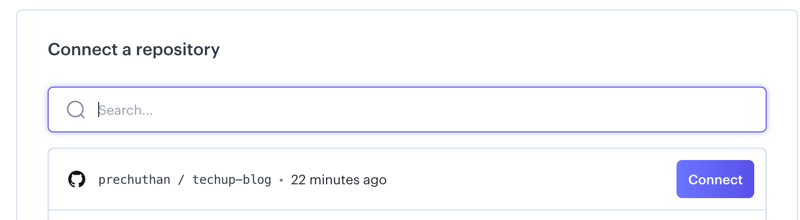
On the right column you will need to click on "+ Connect Account" to connect your GitHub account to Render.
Click on "Connect" for the repository name which your created in Step 1
Leave the Name field as it's default value
Ensure that the Region is set to "Singapore (Southeast Asia)"
Ensure that your Branch is selected (yours may be called "master" or "main")
Leave the Root Directory field blank
Leave the Runtime as "Node"
Change the Build Command to
yarn; npm install prisma@latest @prisma/client@latest; npx prisma db push; npx prisma generate; npm install;

Add the Start Command of
node server.jsChange the Instance Type to FREE
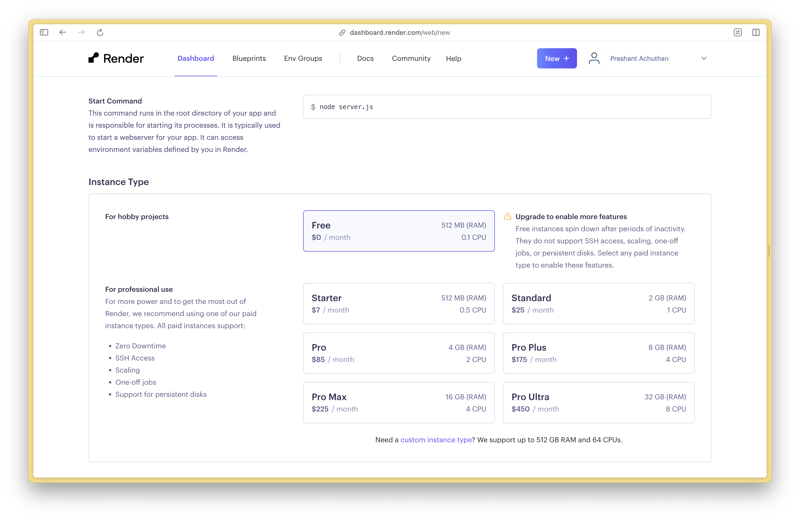
Add a new Environment Variable of name
DATABASE_URLwith the value of your copiedExternal Database URLin Step 6. (If you have misplaced this URL, not to worry. Go to https://dashboard.render.com/ and click on your database. Scroll down and simply copy the External Database URL again.)

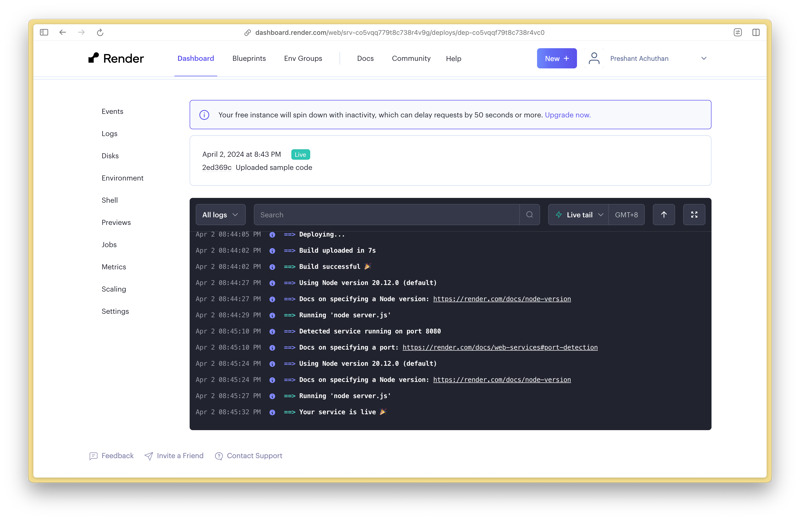
Click on the "Create Web Service" button to start deploying
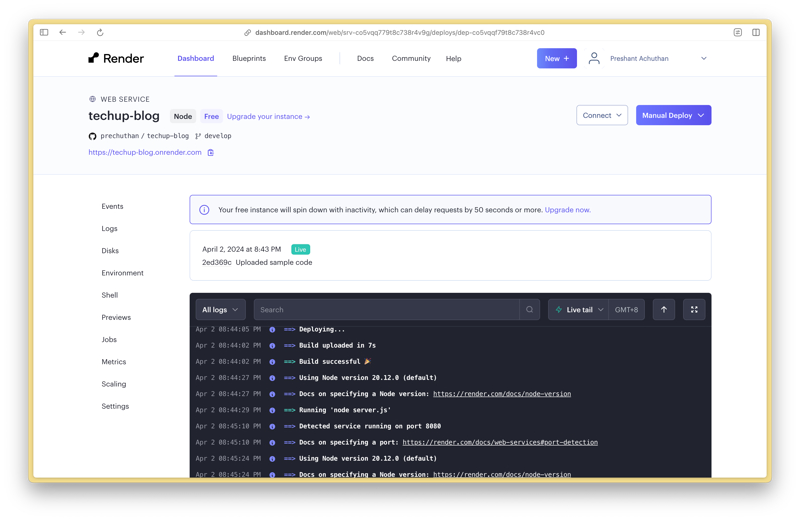
You will be redirected to a new page which shows the logs of the server build happening. It would take approximately 2-4mins for the the server to full deploy your app.
Your app is deployed once you see the line "==> Your service is live 🎉" in the logs.
8. Accessing your newly deployed web application
At the top of the same deploy page with the logs, you will see a URL (in my case it is https://techup-blog.onrender.com). Click on this link and it will bring you to your web application.
You should now be able to view the sample web app which you have deployed on your own Render server!
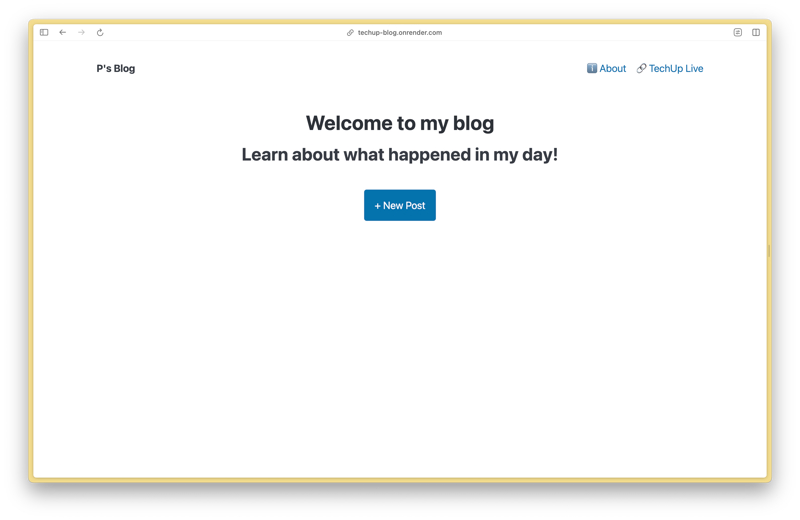
Have fun playing around with the sample web app by Adding and Deleting blog posts!
Last updated